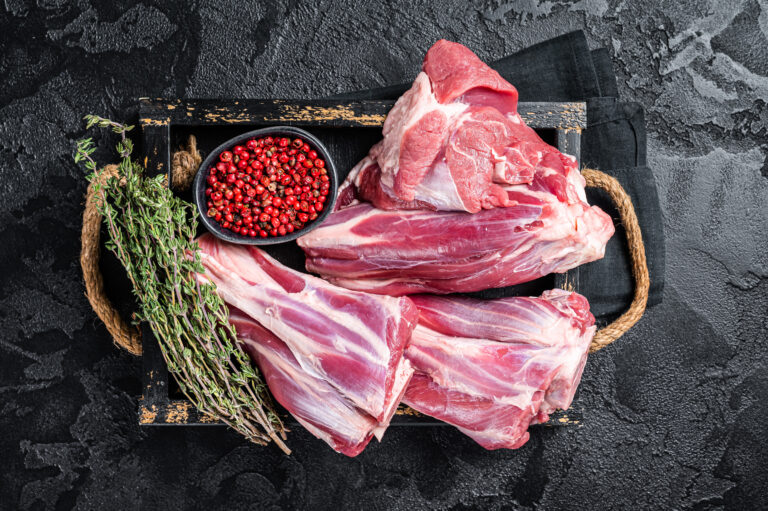
How to Dry-Age Venison at Home for Better Flavor and Tenderness
Step-by-step guide to dry-aging venison at home. Learn proper temperature, humidity, timing, and trimming techniques for tender, flavorful game meat.

Dry-aging venison transforms gamey meat into something tender, flavorful, and worth the wait. You’ll need a dedicated fridge, patience, and attention to a few critical details, but the results make every hunter’s harvest taste like premium game meat.
Disclosure: As an Amazon Associate, this site earns from qualifying purchases. Thank you!
Why Dry Age Venison Instead of Just Cooking It Fresh
Fresh venison often tastes gamey and can be tough, especially if the deer wasn’t field-dressed quickly or aged properly. Dry-aging breaks down muscle fibers through enzymatic action while concentrating flavors through moisture loss.
The process works differently than aging beef at home because venison has less intramuscular fat. You won’t get the same buttery richness, but you’ll develop a cleaner, more intense meat flavor with noticeably improved texture.
Most hunters hang their deer for a few days, but that’s basic aging. True dry-aging requires controlled temperature and humidity over weeks, not days. This isn’t about letting meat sit in your garage. It’s about creating specific conditions that encourage enzymatic breakdown while preventing bacterial growth.
Setting Up Your Dry-Aging Space
You need a dedicated refrigerator for this. Your kitchen fridge won’t work because you’re opening it constantly, and venison needs stable conditions without competing food odors.
Pick up a small chest freezer or compact refrigerator that you can set to precise temperatures. Look for models with external temperature controls, not just dial settings. Digital control gives you the accuracy you need.
Install a separate thermometer and hygrometer inside to monitor conditions independently. Built-in gauges aren’t always accurate, and you can’t afford guesswork here.
Temperature and Humidity Requirements
Keep your dry-aging fridge between 34°F and 38°F. Below 34°F slows enzymatic activity too much. Above 38°F invites bacterial problems.
Humidity should stay between 70% and 80%. Too dry and your venison desiccates into jerky. Too humid and you risk spoilage. Most fridges run drier than ideal, which works better than too wet.
If humidity drops below 60%, place a small pan of water in the bottom of the fridge. Check it daily and refill as needed. You can check current prices on digital hygrometers that give you real-time readings.
Air Circulation Matters
Still air creates uneven drying and potential mold spots. You need gentle air movement across all surfaces of your venison.
A small USB-powered fan works perfectly. Position it to blow across the meat without blasting it directly. You want circulation, not wind tunnel conditions.
Never let venison touch the sides or back of the fridge. Use a wire rack elevated off any surfaces. This allows air to reach every part of the meat.
Preparing Venison for Dry-Aging
Start with whole primal cuts, not individual steaks. Backstraps and hindquarters work best. You’ll trim away the dried exterior later, and small cuts would disappear entirely.
Don’t wash the meat. Pat it dry with paper towels if there’s visible moisture, but water introduces problems. You want the surface as dry as possible before aging begins.
Leave fat and silver skin intact during aging. They protect the meat underneath. You’ll remove them during final trimming after the aging period completes.
Rack Setup
Place your venison on a wire cooling rack set inside a rimmed baking sheet. This catches any drips and keeps the fridge clean.
Leave at least two inches of space around each piece of meat. Crowding prevents proper air circulation and creates pockets where humidity builds up.
Position the rack in the middle of the fridge where temperature stays most consistent. Avoid the top near the fan or the bottom where cold air settles.
The Dry-Aging Timeline
Venison reaches optimal tenderness and flavor between 14 and 21 days. Anything less than 10 days barely counts as dry-aging. Beyond 28 days, you’re entering advanced territory that requires more expertise.
During the first week, you’ll notice the surface darkening and becoming tacky. This is the pellicle forming. It’s protective and normal.
By day 10, the exterior turns darker brown to black. The meat feels firm but not hard. This outer layer protects the good meat inside.
Between days 14 and 21, enzymatic breakdown peaks. Your venison develops concentrated flavors and noticeably improved tenderness. This is the sweet spot for most home dry-agers.
Checking Progress
Open the fridge once daily to check conditions and smell the meat. Dry-aged venison smells earthy and rich, never sour or putrid.
Any ammonia smell means something went wrong. Remove the meat immediately if you detect off odors or see slimy patches.
Some white mold is acceptable and actually desirable. It looks fuzzy and wipes off easily. Green, black, or wet mold indicates problems. When in doubt, trust your nose more than your eyes.
Trimming and Processing Aged Venison
After your aging period completes, remove the venison from the fridge. The exterior looks unappetizing, but don’t worry. You’re cutting all that away.
Use a sharp boning knife to trim the dried pellicle completely. Cut away any discolored exterior until you reach the dark red meat underneath. This is your prize.
You’ll lose roughly 20% to 30% of your starting weight through moisture loss and trimming. This concentration is part of what makes the remaining meat taste so good.
Remove silver skin, excess fat, and any remaining connective tissue. Your aged venison should look clean and ready for cutting into steaks or roasts.
Cutting Steaks
Slice backstrap into thick steaks, at least 1.5 inches each. Thin cuts defeat the purpose of all this effort. You want substantial portions that showcase the improved texture.
Hindquarter cuts work well as roasts or can be sliced into individual steaks depending on the muscle group. Keep different muscles separate because they cook differently.
Vacuum seal individual portions or wrap tightly in plastic wrap followed by freezer paper. Aged venison freezes beautifully and maintains quality for months.
Cooking Dry-Aged Venison
Your aged venison deserves simple preparation. Heavy marinades hide the flavors you worked to develop. Salt, pepper, and high heat are all you need.
Bring steaks to room temperature for 30 minutes before cooking. Cold meat cooks unevenly, and you want every advantage with lean game meat.
Sear in a screaming hot cast-iron skillet with a thin layer of high-smoke-point oil. Two minutes per side for medium-rare on thick steaks. Don’t overcook venison. It has no marbling to keep it moist.
Let meat rest for five minutes before slicing. This redistributes juices and prevents everything from running out onto your cutting board.
Seasoning Recommendations
Coarse salt and cracked black pepper are your foundation. Apply generously right before cooking, not hours ahead. You can explore more options through essential spices for home cooking.
A small pat of herb butter finishing the steak adds richness without overwhelming. Rosemary, thyme, and garlic work particularly well with venison’s flavor profile.
Avoid heavy sauces. Maybe a red wine reduction if you want something extra, but your aged meat should stand on its own.
Common Mistakes to Avoid
The biggest error is using your regular kitchen fridge. Temperature swings and competing odors ruin the process. Get a dedicated unit or don’t bother dry-aging.
Starting with small cuts wastes your time. You need substantial pieces that can withstand 20% to 30% loss and still yield usable portions.
Overcrowding the fridge prevents proper air circulation. Better to age in batches than jam everything in at once.
Stopping too early or going too long both create problems. Between 14 and 21 days works for most venison. Trust the timeline.
Temperature Fluctuations
Opening the fridge constantly throws off your carefully maintained environment. Check once daily, don’t fiddle.
Placing your aging fridge in an unheated garage during winter or hot attic in summer makes temperature control nearly impossible. Keep it somewhere with stable ambient temperatures.
Power outages are rare but devastating. If you lose power for more than four hours, your aging run is probably finished. Check carefully before continuing.
Equipment You’ll Actually Need
A dedicated mini-fridge or chest freezer with temperature control forms your foundation. Don’t skimp here. Consistent temperature control determines success or failure.
You need an independent thermometer and hygrometer. Check current prices on combination units that mount inside your fridge.
Wire cooling racks and rimmed baking sheets collect drips and keep everything organized. Get stainless steel that won’t rust in high humidity.
A small USB fan provides crucial air circulation. Battery-powered versions work if your fridge lacks interior outlets.
Sharp knives are essential for trimming. A boning knife with a flexible blade makes removing the pellicle much easier than struggling with a chef’s knife.
Optional But Helpful
A vacuum sealer protects your finished aged venison in the freezer. It’s not required but extends storage life significantly.
UVB lights inside your aging fridge can help control unwanted bacteria and mold. This is advanced technique territory and not necessary for beginners.
Wireless temperature monitors let you track conditions from your phone. Overkill for most people, but convenient if you’re naturally anxious about the process.
Is Dry-Aging Venison Worth the Effort
You’ll spend three weeks monitoring conditions, but the actual work totals maybe two hours spread across the entire process. Most of dry-aging is waiting patiently.
The improvement in tenderness is substantial. The enhanced flavor is noticeable but subtler than you might expect. Think of it as venison with the rough edges smoothed out.
This technique makes the most sense if you hunt regularly and have a steady venison supply. Processing one deer through dry-aging teaches you everything you need for subsequent animals.
For the occasional hunter or someone trying venison from a friend, traditional aging methods might make more sense. Dry-aging requires dedicated equipment and attention that suits committed enthusiasts more than casual experimenters.
How This Compares to Wet Aging
Wet aging involves vacuum-sealing meat and refrigerating it for one to two weeks. It’s simpler and loses less weight to trimming.
Dry-aging produces more concentrated flavors and better crust formation when cooking. Wet-aged meat stays closer to fresh venison character with improved tenderness.
For home cooks without dedicated fridge space, wet aging makes more sense. For those willing to invest in equipment and time, dry-aging delivers superior results. I prefer dry-aging every time because the texture improvement justifies the extra effort.
The techniques behind dry-aging beef apply broadly, but venison’s lean nature means you can’t push aging as far as marbled beef.
Frequently Asked Questions
Can you dry-age venison without a dedicated fridge?
You really can’t. Your kitchen fridge experiences too many temperature swings from constant opening and closing. The competing food odors also transfer to your aging meat. Cross-contamination risks increase substantially when raw venison sits near ready-to-eat foods for weeks. A dedicated fridge costs less than wasting good venison on a failed aging attempt.
How long does dry-aged venison last in the freezer?
Properly vacuum-sealed aged venison maintains peak quality for six to eight months frozen. Freezer paper wrapped portions stay good for three to four months. The aging process doesn’t make meat more perishable. In fact, the dried exterior you trimmed away would have protected the meat if you’d left it on until right before cooking.
What’s the minimum size piece you should dry-age?
Start with pieces at least three pounds, preferably five pounds or larger. You’ll lose significant weight to surface drying and trimming. A two-pound piece becomes disappointingly small after processing. Whole backstraps or hindquarter sections work best. Don’t bother with anything smaller than a decent roast.
Can you stop the aging process partway through?
You can pull meat out whenever you want, but you won’t get full benefits before day 14. The enzymatic breakdown that improves tenderness takes time. Stopping at day seven gives you some improvement but not enough to justify the equipment and effort. Commit to the full two to three weeks or stick with simpler aging methods.
Final Recommendations
Dry-aging venison at home requires upfront investment in equipment but minimal ongoing effort. The improvements in tenderness make tough cuts from older deer completely manageable. The concentrated flavor won’t convert venison haters but will satisfy anyone who already appreciates game meat.
Start with one backstrap to learn the process before committing your entire deer. You’ll dial in your fridge setup and gain confidence for larger batches. Take notes on temperatures, humidity levels, and timing so you can replicate success.
The sweet spot hits between 14 and 21 days at 34°F to 38°F with 70% to 80% humidity. Stick to these parameters for your first several runs before experimenting. Once you nail the basics, you can try longer aging periods or different cuts.
Every hunter owes it to their harvest to process meat properly. Dry-aging represents the pinnacle of home game meat preparation. Your aged venison will outperform anything you can buy and rivals quality you’d find in specialty restaurants. The technique works for other game too, from elk to wild boar, making this knowledge valuable for years of hunting ahead.
This article contains affiliate links. If you purchase through these links, we may earn a small commission at no extra cost to you.