5 Tips for Cooking Beef Striploin to Perfection
Cooking a perfect beef striploin involves key techniques like salting, marinating, pan-searing, grilling, oven-roasting, reverse sear, and sous vide for optimal flavor and tenderness. Resting the steak after cooking is crucial for juicy, flavorful results.

Cooking the perfect beef striploin is an art form that begins with understanding the right techniques. From mastering the sear in a scorching hot skillet to the gentle finesse of basting with butter, every step is crucial for achieving that mouthwatering, perfectly cooked steak.
Disclosure: As an Amazon Associate, this site earns from qualifying purchases. Thank you!
Preparing Your Striploin for Cooking

Before you fire up the grill or heat the skillet, prepping your beef striploin is crucial for that perfect cook. It’s all about enhancing the flavor and the texture to ensure every bite is as satisfying as it should be.
Salting: Enhancing Flavor and Texture
Salting your striploin before cooking is a game-changer. Not only does it season the meat, but it also improves texture, making for a juicier steak. Here’s the trick: salt the steak at least 40 minutes before cooking. This allows the salt time to penetrate and season the meat throughout, not just on the surface. The salt draws out moisture initially, which then gets reabsorbed, carrying the salt deep into the steak. For an even more enhanced flavor, consider using kosher or sea salt; their coarser grains don’t dissolve as quickly, providing a nice, crunchy texture to the crust.
To Marinade or Not: Seasoning Tips for Striploin
Marinating your striploin steak can infuse additional flavors that salt alone cannot achieve. However, not all steaks need a marinade. A high-quality striploin, with its rich marbling and beefy flavors, often needs little more than a generous seasoning of salt and pepper. If you choose to marinade, keep it simple to let the meat’s natural flavors shine through. Think olive oil, garlic, and fresh herbs, and marinate for a few hours, not days, to tenderize without overpowering. Remember, the goal is to complement the striploin’s flavor, not mask it.
Classic Pan-Searing: Steps for a Perfect Crust
Achieving a perfect crust on your beef striploin isn’t just cooking; it’s an art. Let’s break down the steps to master this classic cooking technique.
Preparing Your Pan and Ingredients
First things first, get your skillet ready. A heavy, nonstick, or better yet, a cast-iron skillet works wonders for a hard sear. Heat it over medium for about 5 minutes until it’s really hot. Remember, a screaming hot pan is non-negotiable for that coveted sear.
While the skillet is heating, take your steak. It should have been salted at least 40 minutes ahead, as mentioned before, to enhance both flavor and texture. Ensure it’s at room temperature to promote even cooking. No oil in the pan, and no water. You’re going for pure, unadulterated sear.
The Detailed Pan-Searing Process Explained
Place your steaks in the pan — careful not to overcrowd. Let them cook undisturbed. For a 1-inch thick striploin aiming for medium-rare, you’re looking at about 12-13 minutes total, flipping about a minute before the halfway mark. Use a meat thermometer to check; 130°F is your magic number.
After flipping, resist the urge to poke or move the steak around. This patience pays off with a beautifully browned crust, giving your striploin unmistakable texture and depth of flavor.
Basting Essentials: Locking in Moisture and Flavor
For the basting. Reduce your heat to medium after you’ve flipped the steak, and add some high-quality butter to the pan. Once it melts and starts bubbling, spoon this liquid gold over the steak, basting it thoroughly.
This step isn’t just for show — it cooks the top and sides of the steak, ensuring even cooking and introducing an additional layer of flavor. The hot butter works its way into the meat, ensuring it’s juicy, tender, and full of flavor.
Remember, resting your steak after cooking is crucial. Give it a good 5 minutes under foil to let those juices redistribute. This ensures each bite is as delicious as the first.
Mastering this technique takes a little practice, but once you’ve got it down, you’ll be serving up restaurant-quality striploin from your kitchen.
Mastering the Grill: Techniques for Striploin
Once you’ve nailed the pan-searing technique, it’s time to tackle the grill. Grilling striploin not only imbues it with a smoky richness but also offers an authentic steakhouse finish right in your backyard. Let’s dive into making your grill adventures with Striploin a raving success.
Prepping the Grill for Optimal Results
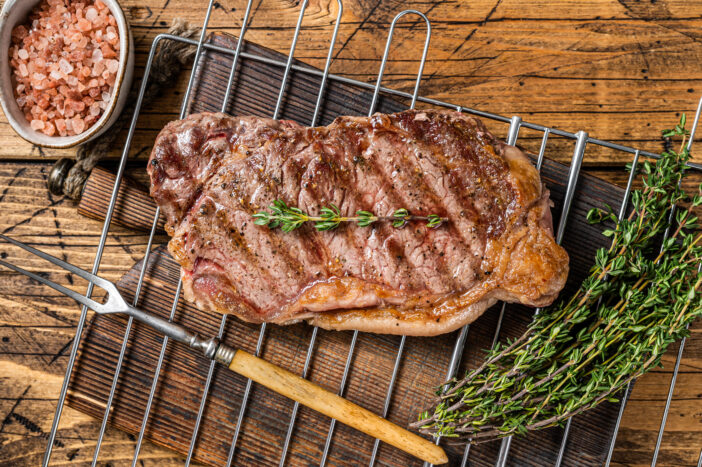
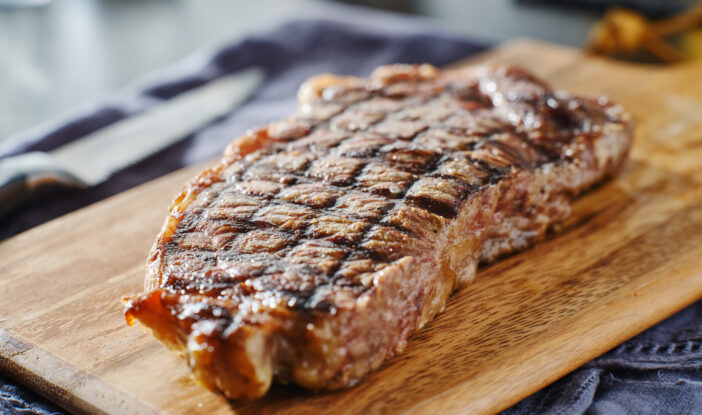
First thing first: to achieve that sought-after sear, your grill needs to be hot, really hot. Begin by cranking your grill up to high. This initial blast of heat is crucial for achieving the perfect crust that seals in juices. While it’s heating, take this opportunity to clean the grill grates. A clean surface ensures even cooking and prevents sticking, leaving those beautiful grill marks that are synonymous with a masterfully cooked steak.
To further enhance the flavor, consider lightly oiling the grates. Use an oil with a high smoke point, like canola or vegetable oil. A simple trick is to dip a folded paper towel in oil, grasp it with tongs, and rub it over the grates. This preparation creates a non-stick surface and adds an extra layer of flavor to your striploin.
Grilling Guidelines: Timing and Temperature Tips
With your grill preheated and ready to go, it’s time to talk about the main event: grilling your striploin to perfection. Here’s where timing and temperature play their starring roles.
Start by searing the steaks. Place them on the hottest part of the grill for 1-2 minutes on each side. This initial sear locks in the juices, providing a moist and tender steak. After searing, move the steaks to a medium, ash-covered part of the grill. Here’s where you’ll continue cooking them to your preferred doneness, turning them about 1 minute before the halfway mark to ensure even cooking.
The key to nailing your preferred doneness is a good meat thermometer and knowing your temperatures. For medium-rare, aim for an internal temperature of 130°F. Remember, your steak will continue to cook (about 5°F higher) once it’s off the grill during the resting period. This carryover cooking is vital for the perfect finish, so pull your steaks off a tad under your goal temperature.
By following these straightforward yet effective techniques, including properly prepping your grill and adhering to time and temperature guidelines, you’ll master the art of grilling striploin, impressing both yourself and your guests with your grill prowess.
Oven Roasting: The Low and Slow Advantage
Transitioning from the searing heat of a grill or skillet, oven-roasting your beef striploin embraces a different philosophy: the magic of low and slow cooking. This method not only ensures even cooking throughout the meat but also enhances its natural flavors, making it utterly tender and juicy. Let’s dive into how you can master this technique for a sublime striploin experience.
Setting Up Your Oven for Striploin Cooking
First things first, you’ve got to get your oven ready. Preheat it to 325°F, a temperature that strikes the perfect balance between cooking the steak thoroughly and preserving its juicy interior. While your oven warms up, take a moment to position the racks. Placing the rack in the middle ensures your striploin cooks evenly on all sides without direct heat singeing the bottom or top unduly.
Opt for a heavyweight roasting pan or a high-sided cast iron skillet if you’re after that coveted crust without heading outdoors to the grill. The heft of these pans retains and distributes heat evenly, providing a stable cooking environment for your striploin.
Striploin Roasting Times and Techniques
The key to a perfect oven-roasted striploin lies in the balance of time and temperature. Begin by seasoning your steak with salt, pepper, and any additional herbs or spices you prefer. If you’ve marinated your steak in advance, ensure it’s at room temperature before it goes into the oven to promote even cooking.
For a medium-rare finish, roast your striploin for approximately 20-25 minutes per pound. It’s crucial to use a meat thermometer to check for doneness, aiming for an internal temperature of 130°F before removing it from the oven. Remember, the steak’s temperature will continue to rise a few degrees as it rests, reaching the perfect medium-rare sweet spot.
Roasting times will vary depending on the size and thickness of your striploin, as well as your oven’s particular quirks. Keep a close eye on the thermometer rather than the clock to avoid overcooking.
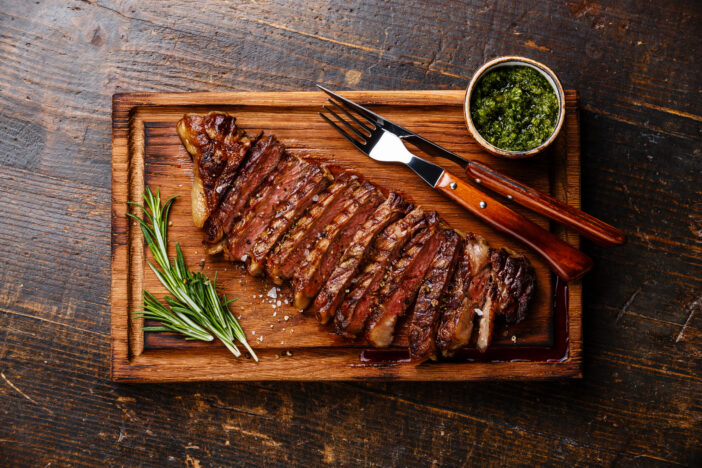
Once your striploin reaches the desired internal temperature, let it rest on a cutting board for at least 10 minutes before slicing. This resting period allows the juices to redistribute, ensuring every bite is as flavorful and moist as the last.
By following these guidelines and adjusting based on the specifics of your oven and steak, you’re well on your way to mastering the art of oven-roasting beef striploin. This technique may take a bit longer, but the succulent, tender results are well worth the wait.
The Reverse Sear Method: A Two-Step Approach
After mastering the art of oven-roasting your beef striploin, it’s time to elevate your cooking game with the reverse sear method. This technique flips traditional searing on its head, promising steakhouse-quality tenderness and flavor right in your kitchen.
Cooking Inside-Out: Oven First, Then Sear
Start your culinary journey by gently warming the beef striploin in a low-temperature oven. Aim for about 275°F (135°C), a sweet spot that slowly cooks the steak, ensuring an evenly cooked interior without overcooking the outer layers. This method patiently brings your steak up to the perfect internal temperature, preparing it for the grand finale—a sear that’s out of this world.
Once your beef has reached an internal temp of about 10°F (6°C) below your target doneness, it’s showtime. Heat a skillet to blazing hot temperatures. This is where the magic happens. The skillet’s high heat creates a Maillard reaction on the surface of the steak, giving it a crispy, caramelized crust that’s bursting with flavor. A crucial tip here: avoid overcrowding the skillet to ensure each striploin gets the perfect sear.
Achieving Perfection: Temperatures and Resting
Precision is key in the reverse sear method. For a medium-rare finish, remove your steak from the oven at 125°F (52°C), aiming for a final temp of 135°F (57°C) post-sear. Remember, your steak continues to cook even after it leaves the heat, thanks to carryover cooking.
After searing, let your steak rest. This period allows the juices to redistribute throughout the meat, ensuring each bite is as flavorful and tender as the last. Think of it as the steak taking a short nap, waking up more delicious than ever. Resting for about 5-10 minutes should do the trick.
The reverse sear method unlocks levels of flavor and tenderness that are hard to achieve through more traditional methods. It requires patience and precision, but the results are worth every minute. So, the next time you’re looking to impress at the dinner table, embrace the reverse sear. Your guests—and your tastebuds—will thank you.
The Sous Vide Method: Precision Cooking
Building on the artistry of seasoning, marinating, and carefully controlled cooking methods like oven roasting and pan-searing, there’s another culinary technique that ensures exceptional results every time: sous vide cooking. Let’s dive into how this method can transform your beef striploin into a masterpiece of flavor and tenderness.
Understanding Sous Vide Basics
At its core, sous vide is all about precision. The term itself, French for “under vacuum,” hints at the process: food vacuum-sealed in a bag, then cooked in a water bath at a precise, constant temperature. This method is a game-changer, especially for cuts like beef striploin. Why? Because it guarantees consistent doneness edge to edge – no guessing, no poking or prodding, just perfect results. You’ll start by sealing your seasoned striploin in a vacuum or zipper-lock bag, then immerse it in a water bath set to your desired final temperature. It’s a waiting game that pays off, allowing flavors to meld and the meat to cook uniformly without ever overcooking.
Specifics for Sous Vide Striploin
When it comes to striploin, details matter. For that coveted medium-rare finish, set your sous vide device to 129°F (54°C). Timing is flexible but critical – a minimum of 1 hour and up to 4 hours in the bath will ensure your striploin achieves buttery tenderness without losing texture. What’s next? Once bathed to perfection, it’s crucial to sear your steak briefly in a blazing-hot pan or on a grill. This final step creates the beloved crust, incorporating the complexity of flavors developed during the sous vide process with the rich texture of a seared exterior. It’s the ultimate blend of science and culinary art, yielding results that are simply unmatched by traditional means.
By mastering sous vide, you’re promising yourself (and your lucky diners) a striploin that’s not just cooked but curated to perfection. So, arm yourself with a thermometer, patience, and a bit of culinary courage to explore the precision of sous vide cooking. The outcomes? They speak (or rather, taste) for themselves, elevating your home-cooked meals to the echelons of steakhouse quality.
Determining Doneness: Temps and Tests

After diving into the nuances of prepping and cooking your beef striploin with techniques like salting, sous vide, and pan-searing, it’s crucial to nail the final step: ensuring your steak is done to your liking. This section deciphers the art of determining steak doneness through dependable methods, helping you serve that perfect striploin every time.
Internal Temp Guide for Striploin
To achieve the doneness you desire in your beef striploin, a meat thermometer is your best friend. Here’s a quick guide:
- Rare: Aim for an internal temperature of around 120°F to 125°F. Your striploin will have a cool, red center.
- Medium Rare: This sweet spot at 130°F to 135°F offers a warm, red to pink center.
- Medium: Targets 140°F to 145°F for a warm, pink center with increased firmness.
- Medium Well: At 150°F to 155°F, expect a slightly pink to brown center.
- Well Done: If you prefer your steak fully cooked, look for an internal temperature of 160°F and above, resulting in a brown, firmer center.
Remember, steaks continue to cook once removed from the heat, so pulling them off 5°F before the target temp can ensure the perfect doneness post-rest.
The Hand and Face Tests: Traditional Methods
If you don’t have a thermometer handy, old-school techniques like hand and face tests can come to the rescue. These methods rely on texture and firmness as indicators of doneness:
- The Hand Test: Press the base of your thumb with your other hand’s index finger; the soft texture represents a rare steak. By comparing the firmness of your steak to this sensation as you move from your thumb’s base to the tip, you can gauge if your steak is rare, medium-rare, medium, and so on.
- The Face Test: This method might sound unusual, but it works. Feel your cheek for a texture that mimics a rare steak, your chin for medium, and your forehead for well-done. Match these textures to your cooking steak to estimate its doneness.
While these traditional tests can provide quick insights, remember that practice makes perfect, and nothing beats the accuracy of a good meat thermometer. By mastering these temperature and touch techniques, you’re well on your way to serving up beef striploin that’s cooked just how you like it, every time.
Let’s Rest: The Importance of Resting Your Striploin

Unlocking the full potential of your beef striploin doesn’t end with just cooking it right. Letting your steak rest is crucial for a juicy, flavorful meal. This often-overlooked step allows the juices to redistribute, ensuring every bite is as delicious as the first. Whether you’ve pan-seared, oven-roasted, or sous vide your striploin, remember to give it a few minutes of rest before slicing. This patience pays off, transforming your home-cooked steak into a dish that rivals any steakhouse offering. So next time you’re in the kitchen, make sure to factor in resting time—it’s the final touch your beef striploin deserves.


