
6 Ways to Tenderize Cheap Steaks Like Expensive Cuts
Expensive steaks come pre-loaded with the marbling that makes them naturally tender. Budget steaks need a helping hand. These…

Expensive steaks come pre-loaded with the marbling that makes them naturally tender. Budget steaks need a helping hand. These six techniques tenderize cheaper cuts to the point where they rival steaks costing twice as much, all without special equipment or expensive ingredients.
Disclosure: As an Amazon Associate, this site earns from qualifying purchases. Thank you!
1. Salt Early (Dry Brine)
Salt applied 45 minutes to 24 hours before cooking breaks down surface proteins through osmosis, creating a more tender exterior and better moisture retention. Use 3/4 teaspoon of kosher salt per pound. This is the easiest, cheapest tenderizing method available.
The science: salt draws moisture to the surface initially, then that moisture reabsorbs along with dissolved salt, which denatures muscle proteins and allows them to hold more liquid during cooking. A dry-brined steak loses less juice when seared and develops a better crust.
Timing matters. The 45-minute minimum gives salt enough time to penetrate and start working. Overnight (12 to 24 hours) produces the most dramatic effect, especially on thicker steaks. For steaks thinner than 3/4 inch, stay closer to the 45-minute mark to avoid over-salting.
Pat the steak dry after salting if surface moisture hasn’t fully reabsorbed. A wet surface steams instead of searing. The goal is a dry exterior that browns immediately when it hits the pan or grill.
Don’t rinse the salt off. It seasons the steak while tenderizing. If you’re concerned about sodium intake, reduce the amount to 1/2 teaspoon per pound, but don’t skip this step entirely. The tenderizing effect alone justifies the technique.
2. Mechanical Tenderizing

A meat tenderizer mallet (the side with the pointed teeth) physically breaks up tough muscle fibers and connective tissue. Pound the steak to even thickness, hitting harder on the thickest areas. This method works immediately and is especially effective on round steaks and sirloin.
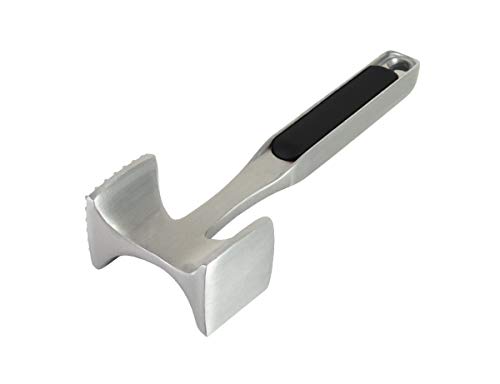
Meat Tenderizer Mallet
Essential for breaking down tough muscle fibers in budget cuts
Place the steak between two sheets of plastic wrap or inside a gallon freezer bag to prevent splatter. Work from the center outward, rotating the steak to ensure even coverage. Each impact shortens muscle fibers and tears through connective tissue that would otherwise create chewiness.
Even thickness matters beyond tenderness. A steak that’s 1.5 inches on one end and 3/4 inch on the other cooks unevenly. The thin section overcooks while the thick section hits your target temperature. Pounding levels the playing field and ensures consistent doneness from edge to edge.
For cube steaks (already mechanically tenderized at the butcher), skip this step. You’ll just turn them to mush. But for untenderized top round, bottom round, eye of round, and budget sirloin cuts, five minutes with a mallet transforms texture dramatically.
Blade tenderizers (tools with multiple thin blades that pierce the meat) work on the same principle but require less effort. They’re available for under competitively priced and handle thicker steaks more easily than a mallet. The downside: blade tenderizing can push surface bacteria deeper into the meat, so cook blade-tenderized steaks to at least 145°F internal temperature for safety.
3. Acidic Marinades
Marinades containing citrus juice, vinegar, wine, or yogurt break down surface proteins over 2 to 8 hours. The acid only penetrates about 1/8 inch, so this is a surface treatment. Don’t over-marinate. More than 12 hours in strong acid turns the exterior mushy.
Effective acidic bases: lime juice, lemon juice, orange juice, red wine vinegar, white wine vinegar, apple cider vinegar, balsamic vinegar, red wine, white wine, buttermilk, plain yogurt. Combine acid with oil (which helps flavors stick) and seasonings for a complete marinade.
A simple formula: 1/4 cup acid, 1/4 cup oil, 2 cloves minced garlic, 1 tablespoon soy sauce, 1 teaspoon black pepper. Scale up as needed. This ratio works for up to 2 pounds of steak.
Use a zip-top bag for marinating. It minimizes the amount of marinade needed and ensures full contact with the meat. Flip the bag halfway through the marinating time. Refrigerate always. Room-temperature marinating invites bacterial growth.
The mushy texture from over-marinating happens because acid denatures proteins too aggressively when given unlimited time. The outer layer essentially pre-cooks, losing its ability to form a proper sear. Stick to the 2-to-8-hour window for tough steaks. Tender cuts like ribeye or strip don’t need marinating at all.
Discard used marinade. It’s absorbed blood and bacteria from raw meat. If you want sauce, make a separate batch or reserve some marinade before it touches the steak.
4. Enzyme-Based Tenderizers
Pineapple juice, kiwi puree, and papaya contain natural enzymes (bromelain, actinidin, papain) that break down proteins aggressively. Use sparingly. Thirty minutes of contact is sufficient. Longer exposure turns the meat to mush. Commercial meat tenderizer powder (like Adolph’s) uses these same enzyme principles.
Fresh pineapple and kiwi work. Canned doesn’t. The canning process deactivates the enzymes. If you’re using pineapple juice, buy it fresh or press your own.
Application method matters. Brush the enzyme source directly onto the steak’s surface rather than submerging the meat. This gives you more control and prevents over-tenderizing. A thin coating on both sides does the job.
Watch the clock closely. At 30 minutes, rinse the enzyme off thoroughly under cold water and pat the steak dry. Enzymes keep working as long as they’re in contact with the meat, and the texture shift from tender to mushy happens fast.
Powdered meat tenderizer from the spice aisle contains papain plus salt and sometimes MSG. Follow package directions, which typically call for 1 teaspoon per pound and 30 minutes of contact time. The powder is shelf-stable and convenient, but fresh fruit enzymes deliver slightly better results without added sodium.
Enzyme tenderizers work best on very tough, lean cuts like bottom round or eye of round where other methods struggle. They’re overkill for moderately tough cuts like sirloin where dry brining and mechanical tenderizing handle the job.
One caution: enzyme-tenderized steak develops an unusual, slightly soft texture even when cooked properly. It’s tender, but it doesn’t feel quite like traditionally cooked steak. Some people love it. Others find it off-putting. Test the method on a single steak before committing to a larger batch.
5. Slice Against the Grain

This isn’t a pre-cooking technique, but proper slicing after cooking makes tough steaks feel dramatically more tender. Cutting perpendicular to the muscle fibers shortens them in each bite, reducing the chewy, stringy sensation. The thinner you slice, the more tender each piece feels.
Identify the grain before cooking. Muscle fibers run in parallel lines across the steak. On flank steak and skirt steak, the grain is obvious. On round steaks and sirloin, look closely under good light. The lines may be subtle but they’re there.
Rotate the cutting board so the grain runs left to right. Your knife should move top to bottom, cutting straight across those fibers. Each slice should expose the ends of many short fibers rather than running parallel to long ones.
Thickness matters. Slices 1/4 inch thick or thinner maximize tenderness. Thicker slices leave longer fibers in each bite, which translates to more chewing. Use a sharp knife. A dull blade crushes fibers instead of cutting cleanly through them, which costs you juice and texture.
Flank steak and skirt steak are nearly inedible if sliced with the grain. The same steaks sliced against the grain at 1/4 inch thickness are tender enough for fajitas, stir-fry, and salads. The difference is that stark.
For steaks with uneven grain direction (some cuts have fibers that shift), slice in sections. Cut the steak into manageable pieces where the grain runs consistently, then slice each piece against its grain.
Let the steak rest 5 to 10 minutes before slicing. Resting allows juices to redistribute. Slice too soon and those juices run onto the cutting board instead of staying in the meat.
6. Low-and-Slow Cooking

Tough cuts that resist quick-cooking tenderizing methods (heavy connective tissue, minimal marbling) respond best to extended cooking at low temperatures. Braising, slow cooking, and sous vide all break down collagen over time. A chuck steak braised for 3 hours or cooked sous vide at 135°F for 24 hours develops a tenderness that no amount of pounding or marinating can match.
Collagen (connective tissue) converts to gelatin when held above 160°F for extended periods. This transformation requires time. Collagen-heavy cuts like chuck, round, and brisket that turn tough and dry when grilled become fork-tender after hours of slow cooking.
Braising method: sear the steak in a hot pan to develop flavor, then transfer to a covered pot or Dutch oven with 1 to 2 cups of liquid (stock, wine, beer, tomato sauce). Cook at 300°F in the oven or on low heat on the stovetop for 2.5 to 4 hours until the meat pulls apart easily.
Slow cooker method: sear the steak first (optional but recommended for flavor), then place in the slow cooker with aromatics and liquid. Cook on low for 6 to 8 hours or high for 3 to 4 hours. Chuck steaks and round steaks work particularly well here.
Sous vide method: seal the steak in a vacuum bag or zip-top bag (using the water displacement method to remove air), set the water bath to 131°F for medium-rare or 140°F for medium, and cook for 24 to 36 hours. The extended time at precise temperature breaks down connective tissue while keeping the meat at your target doneness. Finish with a quick sear in a screaming-hot pan for crust.
Low-and-slow methods don’t work for every cheap cut. Lean steaks with minimal connective tissue (top sirloin, sirloin tip) turn dry and stringy with extended cooking. They need quick, high-heat methods paired with other tenderizing techniques. Save low-and-slow for the cuts that butchers actually label as “stew meat” or “pot roast.” For more guidance on cooking budget roasts like steaks, different methods work better for different situations.
Matching Technique to Cut
Different cuts respond best to different tenderizing methods. Thin steaks with visible grain (flank, skirt): acidic marinade plus slicing against the grain. Thick, lean steaks (sirloin, round): dry brine plus mechanical tenderizing. Thick, fatty cuts with heavy connective tissue (chuck): low-and-slow cooking or sous vide. Matching the technique to the cut’s specific toughness factor produces the most dramatic improvement.
Flank Steak Specifics
1/4-inch thickness, pronounced grain, moderately tough. Best approach: 4 to 6 hours in an acidic marinade, grill over high heat to medium-rare (130°F to 135°F), rest 5 minutes, slice thin against the grain. Optional: mechanical tenderizing before marinating for an even more tender result.
Skirt Steak Specifics
Very thin, extremely pronounced grain, can be chewy if handled wrong. Best approach: dry brine for 2 to 4 hours (longer risks over-salting due to thinness), optional 2-hour acidic marinade, grill hot and fast (2 to 3 minutes per side), slice very thin against the grain immediately after a brief rest. Over-cooking is the biggest mistake with skirt steak. Pull it at 125°F to 130°F.
Top Sirloin Specifics
Thick, moderately lean, some marbling, medium toughness. Best approach: dry brine overnight, mechanical tenderizing with a mallet, grill to 135°F for medium-rare, rest 5 minutes. Slicing against the grain helps but isn’t


