
How to Smoke a Turkey on a Pellet Grill (Crispy Skin Guide)
A smoked turkey on a pellet grill is easier than most people think, and the results blow a conventional…

A smoked turkey on a pellet grill is easier than most people think, and the results blow a conventional oven-roasted bird out of the water. The key adjustments from typical smoking temperatures are what make the difference between crispy-skinned perfection and a soggy, rubbery exterior.
The mistake most first-timers make is treating turkey like brisket or pork shoulder, smoking low and slow at 225°F. That produces pale, flabby skin that peels off in sheets. Turkey needs higher heat to render the fat layer under the skin, and it needs a dry surface before it hits the grill. Get those two things right and the rest falls into place.
Disclosure: As an Amazon Associate, this site earns from qualifying purchases. Thank you!
Prep: Brine or Dry Brine
A wet brine (1 cup kosher salt, 1/2 cup sugar per gallon of water) for 12 to 24 hours adds moisture insurance. A dry brine (generously salting the turkey inside and out and refrigerating uncovered for 24 to 48 hours) produces crispier skin. Either method dramatically improves the finished product.
Dry brining pulls moisture to the surface, which evaporates in the fridge. That leaves a concentrated layer of seasoning on the skin and a drier surface that crisps better. Wet brining adds more total moisture to the meat, which is useful for leaner turkeys or if you’re worried about drying out the breast. Both methods season the meat all the way through, not just on the surface.
Pat the turkey completely dry before smoking. A dry surface is critical for crispy skin. Apply butter or oil under the skin of the breast for additional moisture. Work your fingers gently between the skin and the breast meat to create a pocket, then spread softened butter mixed with herbs (thyme, sage, rosemary) directly on the meat. This bastes the breast from the inside as it cooks and adds a layer of richness that brining alone doesn’t deliver.
Remove the giblets and neck from the cavity. Check both the main cavity and the smaller neck cavity at the front of the bird. Rinse the turkey inside and out under cold water, then pat it bone-dry with paper towels. Any moisture left on the surface will steam instead of crisp.
Temperature: Go Higher Than You Think
Smoke the turkey at 275°F to 325°F, not the typical 225°F used for brisket and pork. The higher temperature renders the fat under the skin faster, creating crispy results. Lower temperatures produce rubbery, chewy skin that’s the most common complaint about smoked turkey.
At 300°F, a 12 to 14 pound turkey takes roughly 3 to 3.5 hours. At 275°F, plan for 3.5 to 4 hours. Always cook to temperature (165°F in the thickest part of the breast), not to time.
Larger birds (16 to 18 pounds) can take 4.5 to 5 hours at 275°F. Smaller birds (10 to 12 pounds) may finish in under 3 hours at 300°F. Use a reliable meat thermometer, not the pop-up timer that comes with some turkeys. Those timers are often inaccurate and trigger too late, leaving you with overcooked breast meat.

Pellet Grill Meat Thermometer
A reliable probe thermometer with remote monitoring eliminates guesswork and lets you track temperature without opening the lid
Check the temperature in two spots: the thickest part of the breast (without touching bone) and the inner thigh near the joint. The breast is done at 165°F. The thighs can safely go to 175°F to 180°F, which breaks down more connective tissue and produces more tender dark meat. If the breast hits 165°F before the thighs reach 170°F, tent the breast with foil to slow its cooking while the thighs catch up.
Some pitmasters pull the breast at 160°F, knowing carryover cooking will push it to 165°F during the rest. That works, but you need to be precise about timing and resting conditions. For beginners, pulling at 165°F is safer.
Spatchcocking for Better Results

Removing the backbone and pressing the turkey flat reduces cook time by 30% to 40% and produces more even results. The breast and thighs cook at closer to the same rate, eliminating the common problem of dry breast and undercooked thighs.
A spatchcocked turkey also has more surface area exposed to smoke, producing a more flavorful result with better bark coverage. Similar techniques work well for duck breast on the grill, where proper scoring and positioning make all the difference.
To spatchcock, place the turkey breast-side down on a cutting board. Use sharp kitchen shears to cut along one side of the backbone from tail to neck. Repeat on the other side to remove the backbone completely. Flip the turkey over and press down firmly on the breastbone until the bird flattens. You’ll feel the keel bone crack. Tuck the wing tips behind the breast or trim them off to prevent burning.
A flattened turkey cooks more predictably because all parts of the bird are roughly the same distance from the heat source. The breast doesn’t tower above the thighs, so it doesn’t finish first and dry out while waiting for the legs to catch up. This geometry shift is the single biggest improvement you can make to turkey-smoking technique.
Spatchcocking also makes the bird easier to carve. You’re already breaking down the structure, so separating the legs and slicing the breast after cooking is faster and cleaner.
Wood Pellet Choice

Pecan and cherry are the best pellet choices for turkey. They produce a mild, slightly sweet smoke that enhances the poultry without overpowering it. Apple is another excellent option. Avoid hickory and mesquite, which can make turkey taste bitter and overly smoky.
Oak is a neutral option that works if you want smoke flavor without any sweetness. Maple adds a subtle sweetness similar to apple but slightly more delicate. Alder is another mild choice, common in the Pacific Northwest for poultry and fish.
Avoid competition blends or pellets marketed for heavy smoke flavor. Turkey absorbs smoke faster than pork or beef, so what tastes balanced on a brisket can taste acrid on poultry. If you only have hickory or mesquite on hand, mix them 50/50 with a milder wood to tone down the intensity.
Pellet quality matters. Low-grade pellets with fillers or bark produce inconsistent heat and off flavors. Stick with 100% hardwood pellets from reputable brands. If your pellets have been stored in a damp garage or shed, they may have absorbed moisture and will burn poorly. Store pellets in a sealed container in a dry location.
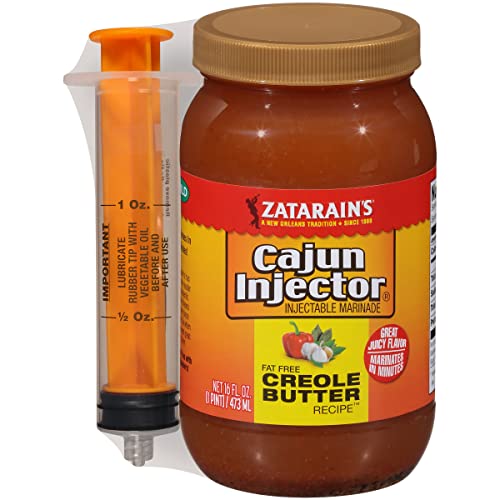
Turkey Injector
Load it with melted butter and herbs for internal moisture and flavor that brining alone can’t achieve
A turkey injector loaded with melted butter and herbs adds internal moisture and flavor that brining alone can’t achieve. Inject in multiple spots across the breast and thighs, withdrawing the needle slowly as you depress the plunger to distribute the liquid evenly. Common injection mixtures include melted butter with garlic and thyme, chicken stock with Cajun seasoning, or melted butter with Worcestershire sauce and black pepper.
Don’t over-inject. Too much liquid creates pockets that leak out during cooking and make the meat spongy. Aim for 1 to 2 tablespoons of injection per pound of turkey. Inject 2 to 4 hours before smoking to give the flavors time to distribute through the meat.
Setup and Smoke Management

Preheat the pellet grill to your target temperature before placing the turkey on the grates. Let the grill stabilize for at least 15 minutes. Temperature swings during the first hour of cooking affect skin texture and total cook time.
Place the turkey directly on the grill grates, breast-side up. If spatchcocked, position it so the thicker parts (legs and thighs) face the hotter side of the grill if your model has hot spots. Most pellet grills have even heat distribution, but some run hotter toward the firepot. Knowing your grill’s quirks helps.
Use a drip pan underneath the turkey to catch rendered fat and drippings. This prevents flare-ups and makes cleanup easier. You can add aromatics (quartered onion, carrot, celery, fresh herbs) to the drip pan. They won’t flavor the turkey directly, but they create a base for gravy if you plan to use the drippings.
Avoid placing a water pan in the grill. Water pans add humidity, which is useful for long, low-temperature smokes (brisket, ribs) where you want to prevent surface drying. Turkey smoked at 275°F to 325°F doesn’t need extra moisture in the air. In fact, humidity works against crispy skin.
Don’t open the lid unnecessarily. Each time you lift it, you lose heat and smoke, extending the cook time by 5 to 10 minutes. Check the temperature only when you expect the bird to be close to done, typically after 2.5 hours for a 12-pound turkey at 300°F.
Resting the Turkey
Rest the smoked turkey for at least 20 to 30 minutes before carving. Tent loosely with foil (don’t wrap tightly, which steams and softens the crispy skin). The rest period allows juices to redistribute throughout the meat. Carving immediately causes those juices to pour onto the cutting board instead of staying in each slice.
A turkey can hold at safe serving temperature for up to 1 hour when tented with foil and placed in a warm spot. This flexibility is useful when coordinating side dishes and timing a holiday meal. Proper storage after the meal is important—learn more about storing meat safely in the fridge to keep leftovers fresh.
Resting also makes carving easier. A hot turkey fresh off the grill is harder to slice cleanly. The meat tears and shreds. After a 20-minute rest, the muscle fibers firm up slightly, and you get cleaner cuts with less jagged edges.
If you need to hold the turkey longer than an hour, keep it in a 170°F oven (or a cooler preheated with hot water, then dried out). Tent it loosely with foil. This method keeps the turkey safely above 140°F (the minimum safe holding temperature) without continuing to cook it aggressively.
Common Mistakes and How to Avoid Them
Smoking at too low a temperature. If your pellet grill struggles to hold 275°F or higher in cold weather, move the cook to a warmer day or insulate the grill with a thermal blanket. Some pellet grills lose significant heat in freezing temperatures, and running them wide open to maintain 225°F won’t produce crispy skin.
Not drying the skin. Patting the turkey dry isn’t enough if you wet-brined it. After brining, refrigerate the turkey uncovered for 4 to 8 hours to air-dry the skin. The surface should feel tacky, not wet, before it goes on the grill. This technique applies to other poultry as well—the same principle delivers crispy smoked chicken wings.
Skipping the thermometer. Cooking by time alone is a gamble. Turkeys vary in


