
Smoked Birria Tacos From a Budget Beef Cut
Birria tacos have blown up for good reason. The combination of deeply spiced braised beef, crispy dipped tortillas, and…

Birria tacos have blown up for good reason. The combination of deeply spiced braised beef, crispy dipped tortillas, and a rich consomé for dunking is one of the best things you can make at home. The good part is that you don’t need an expensive cut to pull it off. Chuck roast and beef shank are the two best options, and they’re often the cheapest cuts at the counter. Add smoke to the equation and you’ve got something that rivals anything coming out of a taqueria.
This recipe walks you through the full process: the dried chile braise, the smoking step, building the consomé, and getting those tacos crispy and golden. It takes some time, but most of it is hands-off. If you’ve already explored budget beef cuts for smoking, you know that chuck and shank aren’t consolation prizes. They’re actually the right tool for this job.
Disclosure: As an Amazon Associate, this site earns from qualifying purchases. Thank you!
Choosing Your Cut: Chuck vs. Shank

Both cuts work beautifully for birria, but they behave a little differently. Chuck roast has more intramuscular fat, which melts into the braise and makes the meat incredibly rich and shred-friendly. Beef shank has more collagen from the leg muscle and bone, which turns the consomé into something silky and almost gelatinous when it chills. Many cooks use a combination of both.
If you’re buying one cut, go with chuck. A 3 to 4 pound bone-in or boneless chuck roast is easy to find and holds up to the long cook without drying out. Beef shank is worth grabbing if your butcher has it. You can check out this guide to cheap beef cuts for slow cooking if you want to understand more about how collagen works in long braises before you shop.
The Dried Chile Braise: Building the Flavor Base
This is where birria gets its character. The chile braise is not hot in the way fresh chiles are. It’s earthy, smoky, and complex. You’re going to use a combination of dried chiles to build layers of flavor.
The Chile Lineup
- Guajillo chiles (4-6): These are the backbone. Fruity, mildly tangy, and bright red. Most of the color in your consomé comes from these.
- Ancho chiles (2-3): Dried poblanos with a sweet, raisin-like depth.
- Pasilla or mulato (1-2, optional): Adds an earthier, slightly chocolatey note.
- Chipotle in adobo (1-2 peppers): A shortcut that adds smokiness without extra effort.
Toast the dried chiles in a dry skillet for about 30 seconds per side, then soak them in hot water for 20 minutes until soft. Blend them with the soaking liquid, a head of roasted garlic, one white onion, tomatoes (fire-roasted canned tomatoes work well here), Mexican oregano, cumin, cloves, black pepper, and a splash of apple cider vinegar. Strain the sauce through a fine mesh strainer for a smoother braise.
The Aromatics and Liquid
After blending and straining the chile sauce, combine it in your braising vessel with beef broth, a cinnamon stick, a couple of bay leaves, and fresh thyme. This becomes both the braising liquid and the base for your consomé. Season it well before the meat goes in.

Lodge 6-Quart Enameled Cast Iron Dutch Oven
The enameled interior handles the acidic chile braise without reacting, and the cast iron holds steady heat through the long cook.
Adding Smoke Before the Braise

This step is what separates homemade smoked birria from the standard braised version. You’re not trying to fully cook the beef on the smoker. You want about 2 hours of smoke exposure to build a bark and add another layer of complexity before the meat goes into the chile braise to finish.
Season the chuck or shank generously with salt, black pepper, garlic powder, and a little smoked paprika. Set your smoker to 250°F and use oak or a mix of oak and cherry wood. These woods pair well with the dried chile flavors without overwhelming them. Hickory works too, but go lighter with it.
After 2 hours, the meat should have a decent bark forming and an internal temperature somewhere around 160°F. Pull it off the smoker and nestle it directly into the chile braise in your Dutch oven. Cover it tightly with a lid or foil.
For fuel, the choice between wood types matters more than charcoal type for flavor here, but if you’re curious about your fire setup, this breakdown of lump charcoal vs briquettes covers the practical differences well.
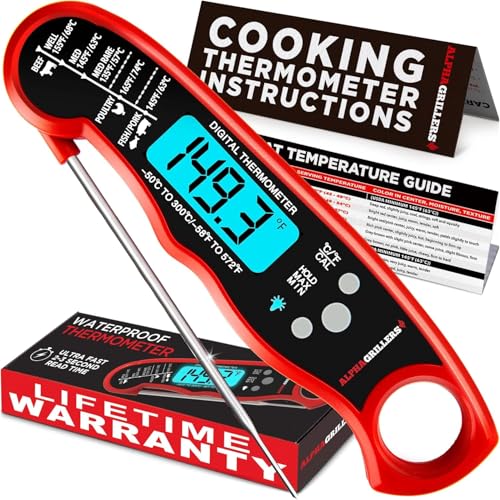
Instant Read Meat Thermometer Digital
A reliable instant-read thermometer takes the guesswork out of knowing when your smoked chuck is ready to transfer to the braise.
Finishing the Braise and Building the Consomé

Once the smoked beef is in the chile braise, slide the covered Dutch oven into a 300°F oven (or back onto a low smoker with the lid on). Braise for 3 to 3.5 hours until the meat pulls apart with almost no resistance. You want it falling apart at the poke of a fork, not just slightly tender.
Lift the beef out carefully and let it rest on a cutting board. Shred it into chunky pieces, not too fine. You want some texture in the tacos. Discard any large pieces of fat or gristle.
Now taste the braising liquid. Skim off excess fat from the top (a fat separator makes this easy), then adjust seasoning. Add more salt, a squeeze of lime, and a pinch of dried oregano if it needs brightness. This liquid becomes your consomé for dipping. Serve it hot in small cups or bowls alongside the tacos. This approach is similar in principle to building a rich au jus for dipping, just with much more chile complexity.
Assembling and Crisping the Tacos

Use corn tortillas. This isn’t negotiable for birria. The corn flavor works with the chiles in a way flour tortillas don’t.
Heat a flat cast iron griddle or skillet over medium-high heat. Dip a corn tortilla quickly into the consomé, coating both sides, then lay it flat on the hot dry surface. Add a handful of shredded beef and a little Oaxacan cheese or mozzarella to one half. Fold the tortilla over and press it gently. Cook for about 90 seconds per side until the tortilla is crisp and the fat from the consomé has crisped up golden. That’s the look you’re going for.
Top with diced white onion, fresh cilantro, a squeeze of lime, and serve immediately with the hot consomé on the side. If you enjoy exploring tacos beyond the birria style, the elk carne asada taco recipe is worth trying when you want something lighter and grilled rather than braised.
Frequently Asked Questions
Can I make smoked birria tacos without a smoker?
Yes. If you don’t have a smoker, you can get a smokier result by using chipotle peppers more generously in the chile braise and adding a small amount of liquid smoke to the braising liquid. You’ll lose the bark texture on the beef, but the flavor will still be deeply smoky and satisfying. Alternatively, you can use a charcoal grill with indirect heat and a couple of wood chunks for 1 to 2 hours before transferring the meat to the braise.
How do I keep the tacos crispy without them getting soggy?
Cook them to order. Birria tacos do not hold well once assembled. The consomé dip gives them that signature crispy exterior when they hit a hot dry pan, but they go soft quickly once they sit. If you’re feeding a crowd, set up an assembly line and cook them in batches of two or three at a time. Having the meat and consomé hot and ready makes this fast.
Can I make the birria a day ahead?
Absolutely, and it’s actually better the next day. The flavors deepen overnight and the fat solidifies on the surface of the consomé, making it easy to skim off cleanly before reheating. Store the shredded beef submerged in the consomé in a sealed container in the fridge. Reheat gently on the stove and you’re ready to go. This is one of those dishes that rewards the extra planning.
Tools Worth Having for This Recipe
A heavy Dutch oven is the most important piece of equipment here. You need something that can go from stovetop searing to oven braising without any issues. Cast iron or enameled cast iron is ideal for the long braise.
A fine mesh strainer is essential for getting the chile sauce smooth before it becomes your braise. A fat separator makes cleaning up the consomé much easier. And a flat cast iron griddle is the best surface for crisping the tortillas evenly. You can find affordable versions of all of these on Amazon without buying anything fancy.

Cast Iron Griddle Flat Top Grill Pan
A flat cast iron griddle gives you even heat across the surface for crisping multiple birria tacos at once without hot spots.
Chuck roast and beef shank are genuinely some of the best budget beef cuts you can buy when you know how to cook them. Smoked birria is proof that cheap meat, dried chiles, and time are all you need to make something worth talking about.
This article contains affiliate links. We may earn a small commission at no extra cost to you.


