
Sous Vide Steak Guide: Temperature, Equipment, and Tips
Sous vide cooking makes it nearly impossible to overcook a steak. You set the exact temperature you want, seal…

Sous vide cooking makes it nearly impossible to overcook a steak. You set the exact temperature you want, seal the steak in a bag, drop it in the water bath, and wait. The result is edge-to-edge perfect doneness with zero guesswork.
No thermometer checks, no prodding, no anxiety about pulling it too early or too late. The water holds the steak at exactly 130°F (or whatever you set), and it stays there until you’re ready to sear.
The method isn’t magic. It’s just physics. Water transfers heat more efficiently than air, and a circulator maintains temperature within 0.1°F. Your steak can’t overshoot because the surrounding medium never exceeds your target.
A ribeye at 130°F for 90 minutes has the same internal temperature as one held for 3 hours. The difference is texture refinement, not doneness.
Here’s everything a beginner needs to know.
Disclosure: As an Amazon Associate, this site earns from qualifying purchases. Thank you!
Equipment You Need

An immersion circulator heats and circulates water to maintain a precise temperature. Models from Anova, Joule, and Inkbird are popular and reliable. Entry-level circulators perform nearly identically to premium models for steak.
The heating element and pump matter more than app features or brand name.

Anova Culinary Sous Vide Precision Cooker
Reliable performance with WiFi connectivity and consistent temperature control
You also need a container. A large stockpot works fine. A 12-quart polycarbonate food service container (the kind restaurants use) gives you more water volume and better insulation, but it’s not required.
Water volume stabilizes temperature when you add cold steak, so bigger is better if you’re cooking multiple steaks.
For bags, you have two options. Vacuum-seal bags remove all air and create tight contact with the steak. Heavy-duty zip-top freezer bags work just as well for short cooks (under 4 hours) if you use the water displacement method.
Skip thin sandwich bags; they leak at sustained heat.
You need a cast iron skillet for the finishing sear. A ripping-hot pan is what creates the crust. Stainless steel works but doesn’t hold heat as well. Nonstick pans can’t handle the temperatures required.
A digital instant-read thermometer isn’t required for the sous vide portion (the circulator handles that), but it’s useful for verifying sear temperature and checking your skillet heat. If you’re also interested in perfecting your conventional grilling technique, learning how to use thermometers effectively can improve your overall cooking accuracy.
Temperature Guide

- Rare: 120°F (very red, cool center, soft texture)
- Medium-rare: 130°F (warm red center, the most popular setting)
- Medium: 137°F (warm pink center, firmer texture)
- Medium-well: 145°F (slightly pink, noticeably firm)
- Well-done: 156°F (no pink, fully firm throughout)
Set the circulator to your desired final temperature. Unlike conventional cooking, there’s no carryover cooking because the steak is already at the exact temperature throughout. If you want medium-rare (130°F), set it to 130°F. That’s what you’ll get.
Most home cooks cluster around 130°F to 137°F. Anything below 120°F enters food safety gray area for extended cooks. Anything above 145°F defeats the point of sous vide; you’re just slow-cooking at that stage.
Temperature precision matters more than you’d expect. A 5-degree difference (130°F versus 135°F) is the gap between medium-rare and the warm edge of medium. Set it exactly where you want it.
Cook Time
A 1-inch steak needs 1 to 2 hours. A 1.5-inch steak needs 1.5 to 3 hours. A 2-inch steak needs 2 to 4 hours. The steak reaches target temperature within the minimum time; additional time further tenderizes the meat through enzymatic activity without overcooking.
The minimum time brings the steak to temperature all the way through. The maximum time gives enzymes more hours to break down connective tissue. A strip steak at 130°F for 1 hour is fully cooked.
The same steak at 130°F for 3 hours has a softer, more tender texture but identical doneness.
Unlike conventional cooking, going over time (within reason) doesn’t ruin the steak. A steak at 130°F for 3 hours is the same temperature as one at 130°F for 1.5 hours. The texture becomes slightly more tender, not overcooked.
Extended time (beyond 4 hours for standard steaks) can make the texture slightly mushy as muscle fibers break down too much.
Thick steaks benefit from longer cooks. A 2-inch ribeye at 2 hours is good. At 3.5 hours, it’s noticeably more tender without crossing into mushy. The sweet spot for most cuts is somewhere in the upper half of the time range.
Seasoning Before or After
Salt before bagging. It has time to penetrate the meat during the cook. Use the same amount you’d use for grilling: about 3/4 teaspoon of kosher salt per pound of steak. Freshly ground black pepper goes in the bag too.
Skip fresh garlic and woody herbs (rosemary, thyme) in the bag. Extended heat amplifies their flavors to an overwhelming degree. A hint of rosemary becomes a mouthful of pine. Add these during the sear instead.
Dry rubs and spice blends work fine in the bag. They won’t form a crust (that happens during searing), but they’ll season the meat. Wet marinades are trickier; the vacuum process can pull liquid out of the meat.
If you’re marinating, do it before bagging and pat the steak mostly dry before sealing.
The Critical Sear

Sous vide steak comes out of the bag looking gray and unappealing. The finishing sear is what creates the caramelized, brown crust that makes steak taste great. Pat the steak completely dry with paper towels.
Excess moisture creates steam instead of sear. Press hard; you want the surface as dry as possible.
Heat a cast iron skillet until smoking. This takes 3 to 5 minutes over high heat. You want the pan so hot that a drop of water evaporates instantly. Add a thin layer of high-smoke-point oil (avocado, grapeseed, or refined safflower). Swirl to coat.
Sear the steak for 45 to 60 seconds per side. Don’t move it. Let it sit and develop crust. Flip once. Add butter, smashed garlic cloves, and thyme sprigs to the pan, tilting to pool the butter. Baste for 15 seconds, spooning the foaming butter over the steak.
The sear should be fast and intense. Spending too long in the pan overcooks the edges, creating a gray band under the crust. You’re aiming for deep brown color in under 2 minutes total pan time. For detailed techniques on achieving the perfect crust, see our guide on searing sous vide steak.
Some cooks freeze the steak for 10 minutes after the sous vide bath and before searing. This drops the surface temperature and buys you a few extra seconds of sear time without overcooking the edge. It works, but it’s not required for good results.
Equipment at Three Price Points
Entry Level
Any basic immersion circulator (Anova Nano, Inkbird, generic Amazon models) plus a large pot you already own, plus zip-top bags with the water displacement method. This setup produces the same steak quality as expensive equipment.
The pot loses heat faster than an insulated container, so the circulator works harder, but the steak doesn’t know the difference.
Mid-Range
A quality circulator with WiFi connectivity, a dedicated polycarbonate container with a lid (12 to 18 quarts), and vacuum sealer bags for better contact and long cooks.
WiFi lets you monitor temperature from your phone and adjust remotely. The lid reduces evaporation on long cooks. A FoodSaver-style vacuum sealer makes bag prep faster.
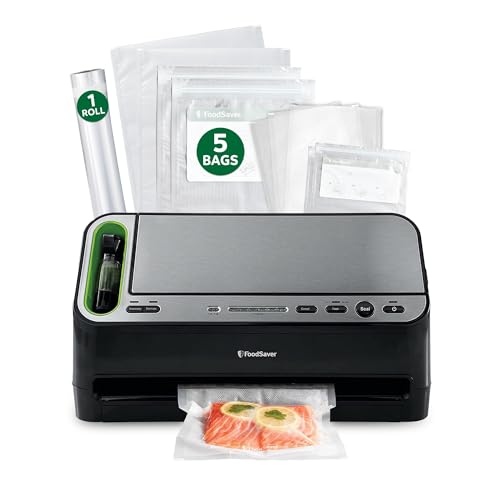
FoodSaver Vacuum Sealer System
Makes bag preparation faster and handles longer cooks better than zip-top bags
Premium
A chamber vacuum sealer (handles liquids and marinades without mess), insulated container (Cambro or LIPAVI), and premium circulator (Anova Precision or Joule). This level is for cooks who sous vide multiple times per week and want maximum convenience.
Chamber sealers compress the bag uniformly and don’t pull liquid out of marinades. Insulated containers hold temperature with less circulator effort.
The steak quality is virtually identical across all three setups. The premium equipment buys convenience and speed, not better food. A budget circulator and a zip-top bag deliver the same 130°F edge-to-edge ribeye as a high-end setup.
Common Mistakes to Avoid
Undersalting. Sous vide doesn’t concentrate flavors through evaporation like grilling does. Season aggressively.
Skipping the dry step before searing. A wet steak steams instead of browning. Pat it bone-dry.
Searing on medium heat. You need high heat, smoking-hot skillet, or you won’t get crust before overcooking the edges.
Leaving the steak in the bag too long after cooking. If you’re not ready to sear, drop the sealed bag into an ice bath to stop enzymatic activity. Don’t leave it sitting in warm water for an extra hour.
Using too much oil in the sear pan. A thin film is enough. Pooling oil lowers pan temperature and makes a greasy crust.
Cooking frozen steak without adding time. You can sous vide from frozen, but add 30 to 60 minutes to the minimum cook time to account for the frozen core.
When Sous Vide Isn’t the Right Move
Thin steaks (under 3/4 inch) cook so fast on a grill or in a pan that sous vide adds unnecessary steps. A minute per side gets you medium-rare without the bag and bath.


