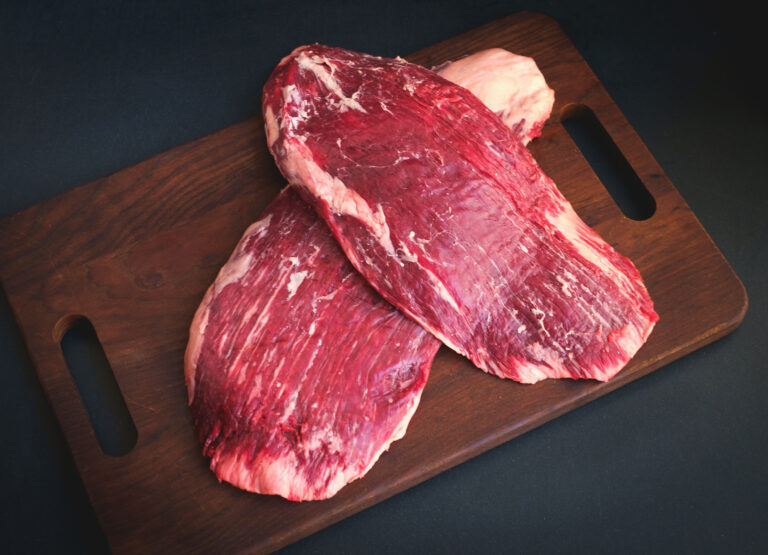
Why Your Grilled Steak Is Tough (And How to Fix It)
You spent good money on steaks, fired up the grill, and ended up chewing through something that felt more…

You spent good money on steaks, fired up the grill, and ended up chewing through something that felt more like shoe leather than dinner. It’s frustrating, but the fix is usually simpler than you think. Most tough grilled steaks come down to one of four common mistakes.
The cut, the temperature, the timing, and the rest period all play a role. Get these right, and you’ll be turning out tender, juicy steaks every time.
Disclosure: As an Amazon Associate, this site earns from qualifying purchases. Thank you!
You Picked the Wrong Cut

Not every cut of beef is meant for the grill. Lean cuts like eye of round, bottom round, and even top sirloin can turn tough and chewy over direct high heat. These cuts lack the intramuscular fat (marbling) that melts during grilling and keeps the meat moist. They’re better suited for slow cooking methods like braising or pot roasting, where connective tissue breaks down over hours at low temperature.
The best grilling steaks have visible marbling throughout: ribeye, strip steak, T-bone, and flat iron. Ribeye runs competitively priced to competitively priced per pound at most grocery stores and gives you the most forgiving eating experience thanks to heavy marbling. Strip steak (also called New York strip) sits competitively priced to competitively priced per pound and offers a leaner, beefier flavor with enough fat to stay tender. T-bone and porterhouse combine strip and tenderloin, running competitively priced to competitively priced per pound depending on the size of the tenderloin section. If you’re unsure which cut to choose at the store, understanding the basics of different meat cuts can simplify your decision.
If you’re on a budget, chuck eye steak is a great alternative that grills beautifully at a lower price point. You’ll find it competitively priced to competitively priced per pound, and it’s essentially the poor man’s ribeye, cut from the same muscle group but just outside the premium rib section. The marbling is nearly identical.
Skirt steak and flank steak also work well on the grill, but they need to be sliced thin against the grain after cooking. These cuts have long muscle fibers that run in one direction. Cutting perpendicular to those fibers shortens them into bite-sized pieces. If you slice with the grain, you’re eating the full length of each fiber, which makes every bite chewy no matter how perfectly you cooked it.
Flank steak typically weighs 1.5 to 2 pounds and runs competitively priced to competitively priced per pound. Skirt steak is thinner, weighs around 1 to 1.5 pounds, and competitively priced to competitively priced per pound. Both benefit from a brief marinade (2 to 4 hours) to break down surface proteins, and both should be cooked hot and fast to medium-rare.
You Overcooked It
This is the number one reason for tough steak, and it’s almost always because people cook by time alone instead of using a thermometer. A steak that goes past 145°F internal temperature starts losing moisture rapidly. By 160°F, the muscle fibers have squeezed out most of their juice, and you’re left with a dry, tough piece of meat. The proteins contract tighter the hotter they get, wringing out water like a sponge.
Thickness matters more than weight when timing a steak. A 1-inch ribeye takes 4 to 5 minutes total over direct heat to hit medium-rare. A 1.5-inch ribeye needs 8 to 10 minutes, often requiring a two-zone approach where you sear first and finish on indirect heat. A 2-inch thick steak can take 12 to 15 minutes and almost always needs the indirect zone or a reverse sear method.
Here’s a quick temperature guide for grilled steaks:
- Rare: 120-125°F (cool red center)
- Medium-rare: 130-135°F (warm red center, the sweet spot for most cuts)
- Medium: 135-145°F (warm pink center)
- Medium-well: 145-155°F (slight pink)
- Well-done: 155°F+ (gray throughout, significantly drier)
Pull your steak off the grill about 5 degrees before your target temperature. The internal temp will continue rising as it rests (this is called carryover cooking). An instant-read meat thermometer is the single best investment you can make for better grilling.

Instant-Read Meat Thermometer
Essential tool for perfect doneness every time. Digital models read in 2-3 seconds compared to 15-20 seconds for dial types.
A decent digital thermometer reads in 2 to 3 seconds. The cheap dial thermometers take 15 to 20 seconds and often read 5 to 10 degrees off.
Insert the probe through the side of the steak into the center, avoiding fat pockets and bone. The center is the last part to heat up, so that’s your true internal temperature. If you’re cooking multiple steaks, check the thickest one.
Carryover cooking adds 5 to 10 degrees depending on the steak’s thickness and how hot your grill is. A thin skirt steak might only rise 3 degrees. A 2-inch ribeye can climb 8 to 10 degrees. Plan accordingly.
You Didn’t Let It Rest

Cutting into a steak immediately after it comes off the grill causes all those flavorful juices to pour out onto the cutting board instead of staying in the meat. The muscle fibers are tightly contracted from the heat, and they need a few minutes to relax and reabsorb the liquid. Think of it like a wet sponge that’s been squeezed tight. If you cut it while it’s compressed, the water runs out. Let it relax first, and the liquid stays inside.
Rest steaks for 5 to 10 minutes on a cutting board. A standard 1-inch steak needs 5 minutes. Thicker cuts benefit from the full 10 minutes. Don’t tent them tightly with foil (that steams the crust and makes it soggy). Just let them sit loosely covered or uncovered. The steak won’t get cold; it’ll be the perfect eating temperature when you slice in, usually around 120°F to 125°F at the surface and hotter in the center.
During the rest, the temperature evens out. The center cools slightly, the exterior stays warm, and the juices redistribute from the hot center toward the cooler edges. You’ll lose maybe 2 to 3 degrees on the internal temp, but you’ll gain back moisture and tenderness.
If you’re resting multiple steaks, place them on a wire rack set over a sheet pan instead of directly on a cutting board. This prevents the bottom from steaming in its own juices and losing the crust.
Your Seasoning Game Needs Work
Under-seasoning is surprisingly common. Steakhouses use significantly more salt than most home cooks realize. For a standard 12-ounce steak, you want about 3/4 teaspoon of coarse kosher salt per side. That sounds like a lot, but much of it stays on the surface or drips off during cooking. What remains penetrates the meat and amplifies the natural beef flavor.
The best approach is to salt your steaks at least 45 minutes before grilling, or even the night before. This gives the salt time to penetrate the meat through osmosis. When you first apply salt, it draws moisture to the surface. That looks like the steak is sweating. After 30 to 45 minutes, the salt dissolves into that moisture and gets pulled back into the muscle tissue, seasoning from the inside out. By the time you grill, the surface is dry again, which promotes better browning.
If you salt right before cooking, the surface moisture drawn out by the salt hasn’t had time to reabsorb, which can interfere with getting a good sear. You’ll steam instead of sear for the first minute or two. If you’re short on time, either salt immediately before cooking (within 3 minutes) so the moisture hasn’t surfaced yet, or wait the full 45 minutes.
A quality coarse kosher salt is better than table salt for steaks. The larger crystals distribute more evenly and dissolve at the right rate during cooking. Diamond Crystal kosher salt is the gold standard. Morton’s kosher salt is denser, so you’ll need slightly less by volume. Table salt is too fine and tends to over-season in spots.
Finish with fresh cracked black pepper right before the steak hits the grill. If you add pepper too early, the heat can scorch it and make it taste bitter. Coarse-ground pepper holds up better than pre-ground powder.
Some cooks add garlic powder, onion powder, or smoked paprika. These work fine but apply them after salting. The salt is the foundation. Everything else is optional.
Your Grill Isn’t Hot Enough

A good sear requires grill grates that are screaming hot, at least 450°F at the grate level. If your grill isn’t fully preheated (give it 10 to 15 minutes with the lid closed), your steak will steam instead of sear. Steaming creates a gray, rubbery exterior instead of the caramelized brown crust that locks in flavor. The Maillard reaction, which produces that savory browned crust, starts around 300°F but really kicks in above 400°F.
Preheat with all burners on high (or a full chimney of charcoal), then create a two-zone setup by turning off one side. Sear over direct heat for 2 to 3 minutes per side, then move to the cooler side to finish cooking gently if needed. This prevents the outside from burning while the inside slowly climbs to your target temp.
On a gas grill, high heat means all burners cranked to maximum. On a charcoal grill, dump a full chimney (about 80 to 100 briquettes) on one side. The direct zone should register 500°F to 600°F when you hold your hand 6 inches above the grate for 1 to 2 seconds. If you can hold it there for 5 seconds, the grill isn’t hot enough yet.
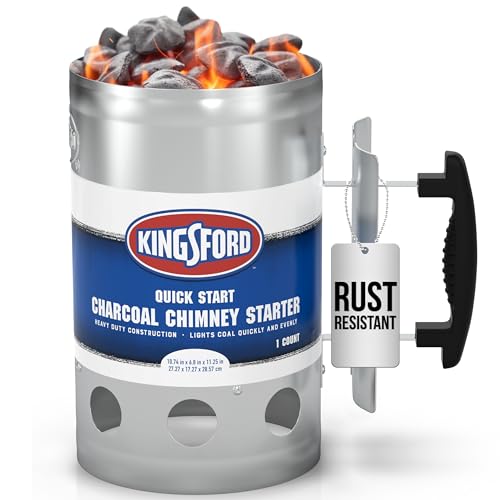
Charcoal Chimney Starter
Gets charcoal evenly lit in 15 minutes without lighter fluid taste. Essential for consistent high-heat grilling.
Dirty grates can also sabotage your sear. Old carbonized grease and food bits insulate the metal and prevent good contact. Scrape your grates clean with a