
How to Fix Dry Smoked Chicken: Brining and Temperature Tips
Dry smoked chicken is one of the most common frustrations for backyard smokers. The low temperatures that produce great…

Dry smoked chicken is one of the most common frustrations for backyard smokers. The low temperatures that produce great smoke flavor also create conditions where chicken loses moisture rapidly. Fortunately, every cause of dry smoked chicken has a clear fix.
Disclosure: As an Amazon Associate, this site earns from qualifying purchases. Thank you!
You’re Not Brining

Brining is the single most effective step for juicy smoked chicken, and it’s the one most people skip. A basic wet brine (1/4 cup kosher salt per quart of water) for 2 to 4 hours gives the chicken a moisture buffer that prevents it from drying out during the long cook.
The salt in the brine changes the protein structure of the meat, allowing it to retain more water during cooking. The difference between brined and unbrined smoked chicken is dramatic, especially in the breast meat.

Meat Brining Kit
A complete brining kit takes the guesswork out of measurements and includes everything you need for consistent results
When you’re short on time, a dry brine works too. Sprinkle kosher salt generously over the entire chicken and let it sit uncovered in the refrigerator for at least 4 hours (overnight is better). The salt draws moisture out, dissolves, and then gets reabsorbed along with the seasoning.
For a wet brine, use cold water and refrigerate the chicken throughout the process. Don’t brine longer than 6 hours or the meat starts to take on a spongy, overly salty texture. Rinse the chicken briefly under cold water after brining, pat it completely dry with paper towels, and let it air-dry in the refrigerator for an hour before smoking.
That drying step tightens the skin and promotes better smoke adhesion. Similar to how you’d prepare a smoked turkey breast, the surface needs to be dry for optimal smoke penetration.
Some people add sugar, herbs, garlic, or peppercorns to their brine. Those extras contribute flavor but don’t affect moisture retention. The salt does the work. Add sugar sparingly, keeping it to 2 tablespoons per quart of water to avoid overly sweet meat.
Your Smoker Temperature Is Too Low
Smoking chicken at 225°F (the standard temperature for brisket and pork shoulder) keeps the chicken in the danger zone too long and dries it out before the skin has a chance to crisp. Chicken doesn’t need the extended collagen breakdown that beef and pork do.
Bump your smoker temperature to 275°F to 325°F for chicken. This higher range cooks the meat faster (reducing moisture loss), renders the fat under the skin, and produces a crispier exterior. You still get excellent smoke flavor at these temperatures.
At 275°F, a whole chicken takes about 2.5 to 3 hours. At 325°F, expect closer to 1.5 to 2 hours. The faster cook means less time for moisture to evaporate from the surface. It also means the skin renders properly instead of turning rubbery, which happens when you smoke too low and slow.
Chicken skin is nearly 50% fat. That fat needs heat to render and crisp. At 225°F, the fat never fully renders, and you end up with flabby, unappetizing skin. At 300°F or higher, the fat melts, the skin tightens, and you get a texture worth eating.
When your smoker struggles to hold steady temps above 275°F, it’s worth considering an upgrade or switching to a kettle grill with indirect heat for chicken. You can still add smoke with wood chunks, but the higher heat capacity of a Weber kettle or similar setup makes a difference.
You’re Not Monitoring Internal Temperature

Chicken breast dries out rapidly past 165°F, and dark meat (thighs, drumsticks) is best around 175°F to 180°F. Without a thermometer, you’re guessing, and most people overcook by a wide margin.
Use a wireless leave-in thermometer with a probe inserted into the thickest part of the breast. Pull the chicken when the breast hits 160°F and let carryover cooking bring it to 165°F during the rest.
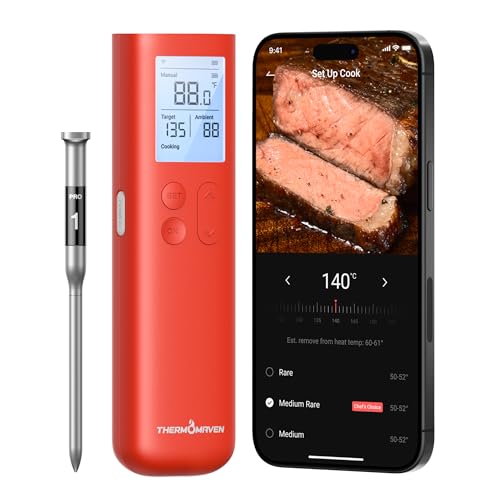
Wireless Meat Thermometer
Essential for monitoring chicken temps without opening the smoker lid repeatedly
Insert the probe horizontally into the breast, pushing it in until it reaches the center. Avoid hitting bone, which conducts heat differently than meat and gives false readings. When you’re smoking a whole chicken, use two probes: one in the breast, one in the thickest part of the thigh near the joint.
Dark meat contains more connective tissue than breast meat, so it benefits from slightly higher finishing temps. At 165°F, thigh meat is technically safe but still chewy. At 175°F to 180°F, the collagen breaks down and the meat turns tender and juicy.
This difference is why whole chickens are tricky: the breast is perfect at 165°F while the thighs want another 10 to 15 degrees. The same principle applies when you’re working with duck breast on the grill, where precise temperature control separates success from overcooked meat.
Instant-read thermometers work, but they require opening the smoker repeatedly to check temps. A wireless model lets you monitor from your phone and alerts you when the chicken is done, so you’re not opening the lid every 20 minutes.
You’re Opening the Lid Too Much
Every time you open the smoker lid, heat and moisture escape. The temperature drops, extending the cook time and drying the chicken further. Set up your thermometer probes, close the lid, and resist the urge to peek.
When you need to spritz or baste, do it quickly. Open the lid, spritz, close. The entire process should take less than 10 seconds.
Each lid opening can drop the smoker temperature by 25°F to 50°F depending on outside air temp and wind. It takes 10 to 15 minutes to recover that lost heat, and during that recovery time the chicken sits in a cooler environment losing moisture without building color or rendering fat.
Spritzing with apple juice, apple cider vinegar, or a mix of both can help keep the surface moist and promote smoke adhesion. But don’t spritz more than once per hour, and skip it entirely if you’re smoking at 300°F or higher. At those temps, the cook is fast enough that spritzing isn’t necessary.
Some smokers lose heat faster than others. Offset stick burners drop temp immediately when you open the firebox or cook chamber. Kamado-style ceramic cookers hold heat better but still suffer from repeated openings. When you find yourself checking the chicken constantly, you need a better thermometer setup, not more peeks.
Try Spatchcocking

A whole chicken smoked intact cooks unevenly because the breast is exposed to more heat than the thighs. Spatchcocking (removing the backbone and flattening the bird) solves this by creating a uniform thickness that cooks evenly.
Spatchcocked chicken also cooks 30% to 40% faster, which means less time losing moisture. Use heavy-duty poultry shears to cut along both sides of the backbone, then press the chicken flat.
Place the chicken breast-side down on a cutting board. Cut along one side of the backbone from tail to neck, then repeat on the other side. Remove and discard the backbone (or save it for stock). Flip the chicken over and press down firmly on the breastbone until you hear a crack and the bird lies flat.
Spatchcocking exposes more surface area to smoke, so you get better bark and more even seasoning coverage. It eliminates the problem of undercooked thighs and overcooked breast because everything is the same distance from the heat source.
For presentation, you can serve the chicken whole after spatchcocking. It looks rustic and impressive, and it’s easier to carve than a bird smoked upright. Just slice down the center of the breast, separate the thighs and drumsticks, and you’re done.
Wrap the Breast if Needed
When your breast meat is cooking too fast (hitting 160°F while the thighs are still at 150°F), tent the breast area loosely with aluminum foil. This slows the breast cooking while letting the thighs catch up, so everything finishes at the right temperature simultaneously.
Don’t wrap the entire chicken. Just drape a sheet of foil over the breast, leaving the thighs exposed. You want to shield the breast from direct heat without trapping steam, which would soften the skin you worked to crisp.
This technique works best on whole chickens that aren’t spatchcocked. When you’ve already flattened the bird, the need for foil is rare because the even thickness prevents one part from racing ahead.
Check the temps every 15 minutes once you’ve added the foil. Pull the foil as soon as the thigh temp catches up. Leaving it on too long turns the breast skin rubbery.
Let the Chicken Rest
Resting isn’t optional. Pulling the chicken off the smoker and immediately carving it releases all the juices you worked to preserve. Let the chicken rest for 10 to 15 minutes before cutting into it.
During the rest, the muscle fibers relax and reabsorb some of the liquid that migrated to the surface during cooking. Cutting too early means that liquid ends up on your cutting board instead of in the meat.
Tent the chicken loosely with foil during the rest if you’re worried about it cooling too much, but don’t wrap it tightly. You want air circulation to prevent the skin from steaming and turning soft.
Carryover cooking continues during the rest, adding another 5°F to 10°F to the internal temp. This is why you pull the breast at 160°F instead of waiting for 165°F on the smoker. By the time you carve, it’s at safe temp without being overcooked.
Consider Chicken Pieces Instead of Whole Birds
Smoking individual chicken pieces (thighs, drumsticks, wings, breasts) gives you more control. You can pull each piece when it hits the right temp instead of compromising on a whole bird where the breast and thighs finish at different times.
Bone-in, skin-on thighs are nearly impossible to overcook. They stay juicy even at 185°F, and the higher fat content means they handle smoke temps better than breast meat. When you’re new to smoking chicken, start with thighs. They’re forgiving, cheap, and packed with flavor.
Chicken breasts dry out faster than any other cut, so if you’re smoking them, brine aggressively and pull them at 160°F. Some people skip breasts entirely for smoking and stick to dark meat.
Wings smoke beautifully at 300°F to 325°F. They’re small enough to cook in under an hour, and the high skin-to-meat ratio means plenty of crispy, smoky surface area. Season them simply with salt, pepper, and garlic powder, or toss them in buffalo sauce after smoking.
Don’t Skip the Rub or Seasoning
Under-seasoned chicken tastes bland no matter how juicy it is. Season generously with a rub or at minimum with kosher salt and black pepper. The smoke adds flavor, but it doesn’t replace seasoning.
A basic poultry rub includes salt, black pepper, garlic powder, onion powder, paprika, and a touch of brown sugar. Apply the rub after brining and drying the chicken. When you dry-brined, the salt is already in the meat, so use a rub without additional salt or go lighter.
Let the seasoned chicken sit at room temperature for 30 minutes before it goes on the smoker. This takes the chill off the meat and promotes more even cooking.
Frequently Asked Questions
Does smoking chicken at higher temperatures reduce smoke flavor?
Slightly, but the difference is minimal. You still get plenty of smoke at 275°F to 325°F, and the improved texture and juiciness more than compensate. The chicken absorbs most of its smoke flavor in the first 45 to 60 minutes.
After that initial period, the surface of the meat forms a pellicle (a tacky layer) that limits further smoke penetration. Running the smoker longer at lower temps doesn’t add more smoke flavor, it just dries the meat out. The same principle applies whether you’re smoking chicken or following a guide on smoking salmon at home.
Can I use a water pan to add moisture?
A water pan helps stabilize smoker temperature and adds humidity, which can slightly reduce surface drying. It’s a useful tool but not a substitute for brining and proper temperature management.
The water pan works by absorbing and releasing heat slowly, which smooths out temperature swings. The humidity it adds keeps the surface of the chicken from forming a hard crust too early, which can seal in moisture. But don’t expect miracles. A water pan won’t save unbrined chicken smoked at 225°F.
What wood is best for smoking chicken?
Fruit woods like apple and cherry produce a mild, sweet smoke that complements chicken beautifully. Pecan and maple are also excellent choices. Avoid heavy woods like mesquite, which can overpower the delicate flavor of poultry.
Use 2 to 3 fist-sized chunks of wood for a standard smoke. Add them all at the start. Adding wood throughout the cook creates bitter, acrid flavors as the new wood combusts and releases creosote. Those interested in exploring different wood options can check out tips on using wood pellets in a charcoal grill for extra smoke.
Hickory works if you use it sparingly, but it’s easy to over-smoke with hickory on chicken. When you’ve got hickory on hand and nothing else, use one small chunk instead of two or three.
Should I remove the skin before smoking?
No. The skin protects the meat from drying out and renders into a crispy, flavorful layer when smoked at proper temps. Skinless chicken smoked low and slow turns into leather.
When you’re concerned about calories or fat, remove the skin after cooking. But leave it on during the smoke. It’s doing important work.
Can I save dry smoked chicken?
Shred it and mix it with barbecue sauce, hot sauce, or a vinaigrette. The added liquid rehydrates the meat and masks the dryness. Dry smoked chicken makes decent chicken salad, tacos, or soup where the meat is combined with other moist ingredients.
You can’t un-dry the meat, but you can make it edible with the right treatment.
This article contains affiliate links. We may earn a small commission at no extra cost to you.


