
How to Sear Sous Vide Steak for a Perfect Crust
You cooked a steak to perfect doneness in the sous vide bath, pulled it out, and stared at a…

You cooked a steak to perfect doneness in the sous vide bath, pulled it out, and stared at a gray, unappetizing piece of meat that looked nothing like the seared steakhouse beauty you expected. The inside is perfect, but the outside needs work. The fix is all about the sear.
Disclosure: As an Amazon Associate, this site earns from qualifying purchases. Thank you!
The Sear Is Everything
Sous vide steak comes out of the bag looking gray and pallid because the low cooking temperature (typically 130-140°F) isn’t hot enough to trigger the Maillard reaction (browning). The Maillard reaction requires temperatures above 300°F. A finishing sear in a screaming hot pan creates the brown, flavorful crust that makes steak look and taste great.
The gray exterior isn’t a sign of poor quality meat or bad technique. It’s exactly what happens when you cook protein at low temperature for an extended period. The myoglobin (the protein that gives meat its red color) denatures and turns grayish-brown, but without the benefit of high heat to create new flavor compounds.
You’ve achieved perfect edge-to-edge doneness, but you’re missing the surface transformation that makes steak appetizing. That transformation happens between 300°F and 500°F, where amino acids and reducing sugars recombine into hundreds of new flavor compounds.
This is why a steak seared in a 500°F pan tastes fundamentally different from one cooked entirely at 135°F, even if the internal temperature is identical. The sear isn’t cosmetic. It’s flavor.
How to Get a Perfect Sear

Pat the steak completely dry with paper towels. Moisture on the surface creates steam, which prevents browning. Every drop of water you remove brings you closer to a better crust.
The surface should feel tacky, almost sticky to the touch. If you see any pooled liquid in the creases of the meat, blot again.
Heat a cast iron skillet until it’s smoking, then add a thin layer of high-smoke-point oil (avocado or canola). The oil should shimmer and ripple across the pan surface. If it’s not smoking lightly, the pan isn’t ready.
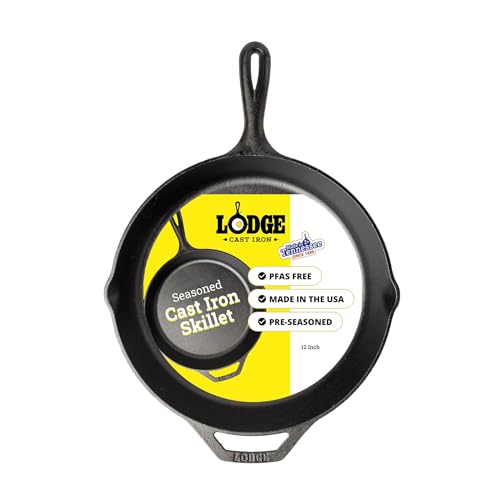
Lodge Cast Iron Skillet
The standard 12-inch Lodge skillet holds heat perfectly for searing and is budget-friendly
Sear the steak for 45 to 60 seconds per side. Press the steak lightly with a spatula to ensure full contact with the pan surface. The sear should be fast and violent. Spending too long in the pan overcooks the edges.
Don’t move the steak during the sear. Let it sit undisturbed for the full 45 seconds before checking. If it releases easily from the pan, it’s ready to flip. If it sticks, give it another 10 to 15 seconds.
The crust forms when proteins bond to the metal, then release once fully browned.
Use tongs to sear the edges. Stand the steak on its fat cap and hold it against the pan for 20 to 30 seconds. Render that strip of fat until it’s golden and crispy. For thick cuts (1.5 inches or more), sear all four edges. Thin cuts can skip this step.
The Butter Baste Finish

During the last 30 seconds, add a tablespoon of butter, 2 crushed garlic cloves, and a sprig of fresh thyme. Tilt the pan and spoon the foaming butter over the steak repeatedly. This adds a rich, golden layer of flavor to the crust.
The butter baste does more than add flavor. It creates a thin, glossy coating that catches light differently than a dry sear, giving the steak a restaurant-quality sheen. The garlic and thyme infuse the butter, which then clings to every crevice of the crust.
Some cooks add a smashed shallot or a few black peppercorns to the butter for variation.
Butter burns at around 350°F, so add it only after the initial high-heat sear. If you add it too early, it smokes and turns bitter. The residual heat in the pan is enough to foam the butter without scorching it. Baste for 20 to 30 seconds, no more. You’re finishing, not cooking.
Other Searing Methods
A charcoal chimney full of blazing coals with a grill grate placed on top produces intense, direct heat for an outdoor sear. The chimney method hits 700°F or higher, giving you a steakhouse-quality crust in 30 seconds per side. The downside is less control. You’re working fast, and there’s no room for error.
A culinary torch works for edges and hard-to-reach surfaces. The torch gives you precision. You can target specific areas that need more color without reheating the entire steak.

Bernzomatic TS8000 Torch
This high-output torch works with both propane and MAPP gas for fast, precise searing
Some cooks use a torch as a finishing pass after the pan sear, hitting any pale spots that didn’t make full contact with the skillet.
A propane or MAPP gas torch produces hotter flames than a butane torch. MAPP gas (methylacetylene-propadiene) burns at 3,730°F compared to propane’s 3,600°F and butane’s 2,610°F. The hotter flame means faster browning with less heat transfer to the interior.
Keep the torch moving. If you hold it in one spot, you’ll char the surface before developing a proper crust.
For outdoor cooks, a grill set to maximum heat with the lid open works, but you need to preheat the grates for at least 10 minutes. Cold grates pull heat away from the steak instead of transferring it in. Brush the grates with oil just before placing the steak to prevent sticking. Sear for 60 to 90 seconds per side, watching for flare-ups from dripping fat. If you want to combine the precision of sous vide with the smoky char of grilling, this outdoor finish delivers exceptional results.
Overcrowded Bags
If multiple steaks are sealed in the same bag, they can press together and create areas where water can’t circulate. These spots cook unevenly and may look grayish even after searing. Seal each steak in its own bag for the most consistent results.
When steaks touch, the surfaces in contact don’t brown during the sear. The moisture trapped between them steams the meat instead of allowing a dry surface to form. You end up with pale, soft patches that no amount of post-sear heat will fully correct. One steak per bag eliminates this entirely.
If you must cook multiple steaks in one bag (say, you’re cooking for a crowd), arrange them in a single layer without overlap. Some cooks use a large bag and fold it accordion-style to create separate compartments. This keeps steaks separated while minimizing plastic waste.
Temperature Selection Tips
The temperature you set on your sous vide circulator directly affects the steak’s appearance and flavor. Lower temperatures (125 to 130°F) produce a very red, rare interior that needs a shorter sear to avoid overcooking the edges. Higher temperatures (135 to 140°F) produce a pink, medium interior with more rendered fat and a slightly different flavor profile.
For ribeye, 130 to 137°F is the sweet spot. The higher end of this range renders more of the intramuscular fat, creating the buttery mouthfeel that makes ribeye special. Below 130°F, that fat stays firm and waxy. Above 137°F, you start losing moisture and the texture becomes less tender.
A ribeye cooked to 135°F for 2 hours has noticeably more melted fat than the same cut cooked to 129°F.
For lean cuts like sirloin and filet, 129 to 132°F preserves moisture while achieving a tender medium-rare. These cuts have less marbling to render, so higher temperatures just dry them out without adding flavor. A sirloin cooked to 140°F tastes and feels like a different piece of meat compared to one cooked to 130°F.
Experiment within these ranges to find your personal preference. For more guidance on choosing the right temperature and equipment for your specific cut, understanding the science behind these numbers helps you dial in exactly what you’re looking for.
Strip steaks land somewhere in between. They have a moderate fat cap and some marbling, so 131 to 135°F works well. The fat cap renders nicely at the higher end, adding beefy flavor without drying out the lean portions.
Cook Time Matters Too
A 1-inch steak reaches equilibrium (uniform temperature throughout) in about 60 minutes. A 2-inch steak needs 90 to 120 minutes. Longer cook times (3 to 4 hours) at the same temperature produce a more tender texture because enzymes have more time to break down connective tissue.
This is most noticeable in tougher cuts like flank or hanger steak.
Don’t exceed 4 hours for tender cuts like ribeye, strip, or filet. Beyond that, the texture becomes mushy. Tougher cuts can go 8 to 12 hours at lower temperatures (131°F) for a texture similar to braised meat, but with precise doneness control.
Common Mistakes Beyond the Sear
Baggy vacuum sealing (with air pockets) causes uneven cooking and can make one side of the steak lighter in color than the other. Ensure the bag is pressed tightly against all surfaces of the steak. Using bags that aren’t rated for sous vide temperatures can leach chemicals or fail during cooking.
Stick with BPA-free bags designed for cooking, or use the water displacement method with heavy-duty zip-top bags rated for sous vide.
Air pockets act as insulation. Water can’t transfer heat through an air gap, so any part of the steak surrounded by air cooks more slowly or not at all. The result is uneven doneness and patchy color.
Press the bag firmly against the steak before sealing, or use the water displacement method (submerge the bag slowly in water, letting pressure force out the air, then seal the top just above the waterline).
Not all plastic bags are safe at sous vide temperatures. Regular zip-top bags can soften and release plasticizers at 140°F or higher. Look for


