
Chicken Injection for Juicy, Flavorful Smoked Birds
Whole chickens are one of the best bargains at any grocery store, but they have a reputation for coming…

Whole chickens are one of the best bargains at any grocery store, but they have a reputation for coming off the smoker dry and bland unless you do something about it. Injection is that something. A well-built injection marinade works from the inside out, saturating the meat with moisture and flavor that a surface rub simply can’t reach. It’s the reason competition BBQ chickens taste like they came from a different bird entirely compared to the one you pull off a backyard grill.
This guide covers a proven chicken injection recipe inspired by competition-style techniques, along with the ratios, ingredients, and injection points that actually make a difference. Whether you’re smoking a four-dollar whole bird from the discount rack or a premium air-chilled chicken, this method will make it taste like you paid three times as much.
Disclosure: As an Amazon Associate, this site earns from qualifying purchases. Thank you!
Why Inject Chicken at All?
Chicken has a few things working against it on the smoker. The breast meat is lean and dries out fast at higher temperatures. The skin acts as a barrier, which is great for crisping but terrible for letting surface marinades penetrate. And because whole birds take longer to cook than individual pieces, there’s more time for moisture to escape.
Brining helps, and if you want to compare the two methods, our guide to essential brine formulas for juicy chicken, turkey, and pork is worth reading alongside this one. Injection is faster, though, and it delivers fat and flavor compounds directly into the muscle fibers, not just moisture. You can also target specific areas, like the breast, that dry out faster than thighs.
The Base Injection Recipe

This is the competition-inspired formula that works on whole birds, halves, or spatchcocked chickens. The ratios below are for one whole chicken (around 4 to 5 pounds). Scale up proportionally for larger birds or multiple chickens.
Ingredients
- 1/2 cup chicken broth (low sodium, so you control the salt)
- 2 tablespoons unsalted butter, melted (adds richness and helps keep breast meat moist)
- 1 tablespoon apple cider vinegar (brightens flavor and tenderizes slightly)
- 1 teaspoon kosher salt
- 1 teaspoon garlic powder
- 1/2 teaspoon onion powder
- 1/2 teaspoon smoked paprika
- 1/4 teaspoon cayenne (optional, adjust to taste)
- 1 tablespoon honey or brown sugar (helps with caramelization and balances the vinegar)
Whisk everything together in a small saucepan over low heat just until the butter is fully incorporated and the salt dissolves. Don’t let it boil. Let it cool to around room temperature before loading it into your injector. Hot liquid can partially cook the surface of the meat when injected, which you don’t want.
Optional Competition-Style Add-Ins
Many competition teams add a small amount of phosphate-based injection powder to their recipe. Phosphates help the meat retain water during cooking and are responsible for that almost unnaturally juicy bite you get from top-tier competition chicken. A little goes a long way, roughly 1/4 teaspoon per cup of liquid, and it shouldn’t be detectable in flavor.
Some pitmasters also add a tablespoon of Italian dressing. It sounds odd but the emulsifiers in the dressing help keep the butter from separating and the herbs add a subtle background note.
How to Actually Inject a Chicken

You need a decent meat injector for this. A flimsy plastic syringe from a dollar-store kit will clog or break mid-session, which is frustrating when you’re working with a butter-based liquid. Look for a stainless steel model with multiple needle tips, including a fine tip for thinner liquids and a wide-bore tip for chunkier marinades.
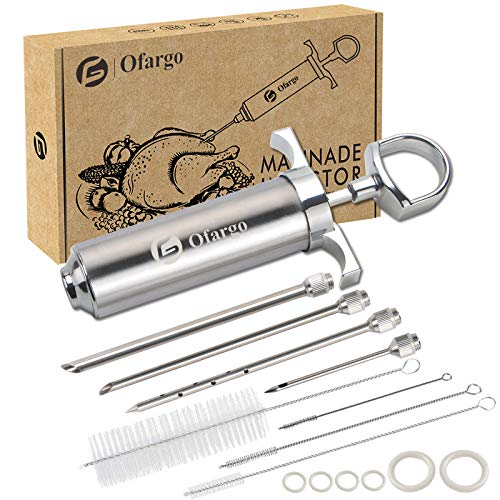
Meat Injector Syringe
A quality stainless steel injector with multiple needle tips handles butter-based injections without clogging and is easy to clean.
Where to Inject on a Whole Chicken
The goal is even distribution without turning the skin into Swiss cheese. Too many injection points means liquid leaks back out before it can absorb. Here’s where to focus:
- Breast: Insert the needle at a low angle near the thickest part of the breast, roughly where the wing meets the body. Inject in two or three spots per breast, pulling the needle back slightly between injections to spread the liquid through the muscle. Each breast gets about 2 to 3 tablespoons total.
- Thighs: Push the needle deep into the thigh from the top, avoiding the bone. One injection point with about 1 tablespoon per thigh is usually enough since dark meat holds moisture better on its own.
- Drumsticks: Optional, but if you’re going the extra mile, one small injection per leg works fine. About 1/2 tablespoon each.
Inject slowly and steadily. If you push the plunger too fast, the liquid will pool and rupture back through the injection hole rather than spreading through the muscle fibers. You’ll feel the resistance change as the muscle fills up.
Timing
Inject the bird at least one hour before it goes on the smoker. Overnight in the fridge is better. The liquid needs time to spread through the meat and the proteins need time to reabsorb some of that moisture rather than just sitting in pockets.
After injecting, pat the skin dry, apply your dry rub, and let it rest uncovered in the fridge if time allows. Dry skin equals crispier skin on the smoker, which is always the goal.
Smoking the Bird After Injection

Injection doesn’t change your smoking technique much, but a few things are worth keeping in mind. Start with your smoker at 275°F rather than the lower 225°F you might use for brisket or ribs. Chicken skin needs higher heat to render and crisp. Low and slow at 225°F gives you rubbery skin, and no injection will fix that.
Wood choice matters too. Apple, cherry, and pecan are the classic choices for chicken because they’re mild and slightly sweet. Hickory works but can overpower the more delicate flavors in your injection if you use too much. For fuel choice, check out our breakdown of lump charcoal vs briquettes if you’re running a charcoal smoker and want consistent temperature control.
Pull the bird when the breast reads 160°F and the thigh reads 175°F on an instant-read thermometer. Carryover heat will bring the breast to the safe 165°F mark as it rests. A 4 to 5 pound chicken at 275°F usually takes around 2 to 2.5 hours.
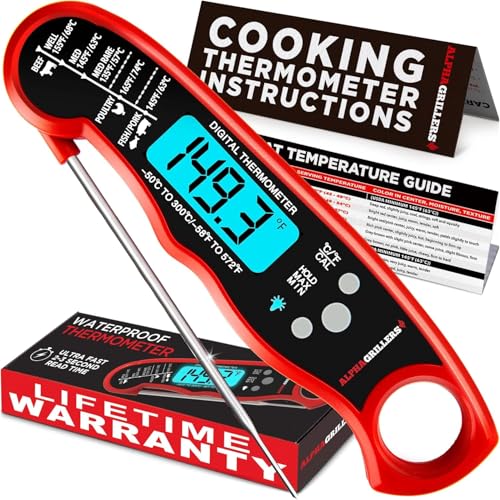
Instant Read Meat Thermometer
An instant-read thermometer is the only reliable way to pull smoked chicken at exactly the right temperature without guessing.
Making Cheap Birds Taste Premium

Whole chickens from budget grocery stores like Aldi are genuinely good value when you apply techniques like this. If you’re curious about overall meat quality at budget retailers, our Aldi meat quality review covers what’s worth buying and what to skip.
The injection alone adds significant perceived quality because most of what people describe as “dry” or “bland” chicken comes from moisture loss during cooking, not from the quality of the bird itself. A properly injected and smoked four-dollar whole chicken can easily outperform a plain roasted premium chicken. The technique is doing most of the heavy lifting here.
If you enjoy getting maximum results from budget-friendly proteins, the same philosophy applies to beef. Our roundup of budget brisket alternatives for smoking covers cuts like chuck roast that respond just as well to the low-and-slow treatment without the brisket price tag.
Frequently Asked Questions
Can I use this injection recipe for smoked chicken thighs or breasts instead of a whole bird?
Yes, and it works really well on bone-in skin-on thighs in particular. Use one injection per thigh or breast, pushing the needle into the thickest part of the meat. Reduce the total liquid since you’re working with smaller pieces, roughly 1 tablespoon per piece is plenty. The cooking time drops significantly for individual pieces, so start checking temperature around the 45-minute mark at 275°F.
Does injection replace dry rub, or do you use both?
Use both. They do different things. The injection works inside the muscle and adds moisture along with internal flavor. The dry rub builds the bark and crust on the outside, which adds texture and a concentrated hit of seasoning when you bite through the skin. Think of them as complementary layers rather than alternatives. Just make sure your rub and injection use compatible flavor profiles so they reinforce each other.
My injection keeps leaking out when I pull the needle. What am I doing wrong?
Two things usually cause this. First, you may be injecting too quickly. Slow down your plunger pressure and give the muscle fibers a second to accept the liquid. Second, you might be injecting too close to the surface. Keep your needle tip at least an inch deep into the meat so the liquid has muscle mass around it to absorb into. If liquid still leaks back out, tilt the bird so gravity helps keep the liquid in the injection site, and give it a few minutes to start absorbing before moving it to the fridge or smoker.
This article contains affiliate links. We may earn a small commission at no extra cost to you.


