
How to Cook a Pork Steak So It’s Tender, Not Tough
Pork shoulder steaks are one of the best deals at the grocery store, but they have a reputation for…

Pork shoulder steaks are one of the best deals at the grocery store, but they have a reputation for turning into shoe leather if you cook them wrong. You’ve probably been there: you throw a thick shoulder steak on a hot grill, pull it off when it looks done, and end up with something tough and chewy that no amount of sauce can fix. It’s frustrating, especially when you know pork shoulder is full of flavor.
The problem isn’t the cut. It’s the cooking method. Pork shoulder steaks come from a hardworking muscle loaded with connective tissue and intramuscular fat, which means they need a different approach than a pork chop or a tenderloin. Once you understand why they get tough, you can stop fighting the meat and start working with it.
Disclosure: As an Amazon Associate, this site earns from qualifying purchases. Thank you!
Why Pork Shoulder Steaks Turn Chewy
Shoulder steaks are sliced from the pork butt or picnic portion of the pig, the same muscle used for pulled pork. That means they’re full of collagen-rich connective tissue. Collagen is what gives slow-smoked pork shoulder its silky, fall-apart texture when you cook it low and slow for hours. But when you blast that same tissue with high, fast heat, it seizes up and stays tough.
The fat distribution also plays a role. Shoulder steaks have fat running throughout in irregular streaks, not a neat cap like a ribeye. If you rush the cook, that fat doesn’t have time to render properly, so instead of melting into the meat and keeping it moist, it stays waxy and greasy.
Finally, a lot of people overcook shoulder steaks out of fear of undercooking pork, then wonder why they’re dry and tough. The USDA-safe internal temp for pork is 145°F, but for shoulder steaks to get genuinely tender, you often want to push further into the 195 to 205°F range, which is where collagen fully converts to gelatin. More on that below.
Method 1: Low and Slow in the Oven

If you want the most forgiving, foolproof method, the oven is your friend. Low and slow heat gives the collagen time to break down without drying out the meat.
How to Do It
- Pat your steaks dry and season generously with salt, pepper, garlic powder, and smoked paprika. Let them sit at room temperature for 20 to 30 minutes.
- Preheat your oven to 300°F.
- Sear the steaks in a cast-iron or oven-safe skillet over medium-high heat, about 2 minutes per side, just to build a crust.
- Transfer the skillet to the oven (or place steaks in a baking dish). Add a splash of chicken broth or apple cider to the bottom to create a little steam environment.
- Cover tightly with foil and cook for 1.5 to 2 hours until the steaks are fork-tender.
- Remove the foil for the last 15 minutes to let the surface firm up a bit.
The goal is tender, not falling apart like pulled pork, though thinner steaks at the 1.5-hour mark will still hold their shape while being genuinely easy to cut. Thicker steaks, around 1 inch or more, may need the full 2 hours.
A reliable instant-read thermometer is essential here. You’re looking for an internal temp somewhere between 190°F and 205°F for that connective tissue to break down fully.

ThermoWorks Thermapen ONE Instant Read Thermometer
The fastest and most accurate instant-read thermometer available, which makes a real difference when you’re trying to hit a precise internal temperature.
Method 2: Braise Then Sear

This is the best of both worlds. You get tender, deeply flavored meat from the braise, plus a proper caramelized crust from a final sear. It takes more time upfront, but the result is genuinely restaurant-quality.
The Braise
Season your steaks and sear them hard in a Dutch oven or heavy pot. Remove them, then sauté some aromatics in the same pot, think onion, garlic, maybe a little celery. Deglaze with something acidic like beer, apple cider vinegar, or white wine, scraping up all the browned bits. Add enough chicken or pork stock to come about halfway up the steaks, nestle them back in, and braise covered at 275 to 300°F for 1.5 to 2 hours.
The acid in the braising liquid helps break down connective tissue faster, which is why a splash of cider vinegar or a can of beer makes a noticeable difference compared to plain water or broth alone.
The Final Sear
Once the steaks are tender, pull them out of the braising liquid and pat them very dry. This step matters. Moisture is the enemy of a good crust. Let them rest on a rack for a few minutes, then sear them in a ripping-hot cast-iron skillet with a high smoke-point oil like avocado oil or refined vegetable oil, about 90 seconds per side.
You can reduce the braising liquid on the stovetop while the steaks rest and use it as a pan sauce. It’s packed with flavor and takes almost no effort.
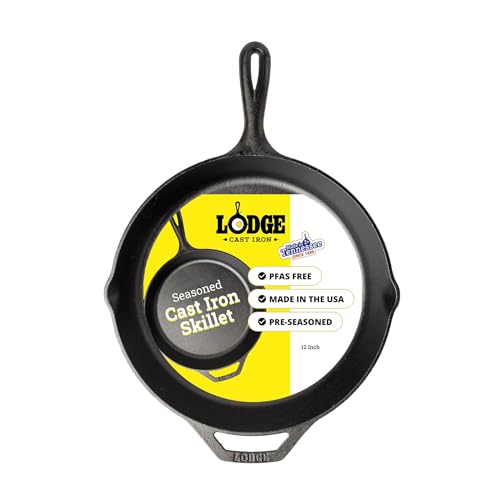
Lodge 12-Inch Cast Iron Skillet
Cast iron retains and distributes heat better than any other pan for getting a deep, even sear on braised meats.
Can You Grill Pork Shoulder Steaks?

Yes, but you need to do it right. Pure high-heat grilling will toughen them up. The trick is a two-zone setup where you start low and finish hot.
Set up your grill with one side on low indirect heat and one side on high direct heat. If you’re using charcoal, check out our breakdown of lump charcoal vs briquettes to figure out which fuel makes more sense for this kind of longer cook.
Start the steaks on the indirect side, covered, until they hit around 185 to 190°F internally. This can take 45 minutes to an hour depending on thickness. Then move them directly over the hot coals or burners for 2 to 3 minutes per side to char the outside. You get smoke, crust, and tender meat all in one cook.
The Case for Brining First

If you have an extra few hours or overnight, brining shoulder steaks before cooking makes a meaningful difference in moisture retention. A simple brine of salt, sugar, and water works well, and you can add peppercorns, bay leaves, and garlic for extra flavor.
For a brine that really works, we put together a full guide on essential brine formulas for pork that covers ratios and timing. Even a 2-hour brine will help, though overnight is better.
After brining, pat the steaks completely dry before cooking. Wet meat won’t sear properly, and if you’re doing the braise-then-sear method, you want that crust to form fast.
Why Shoulder Steaks Are Worth the Effort
Pork shoulder steaks typically cost a fraction of what you’d pay for pork chops or tenderloin, and the flavor is significantly better. All that connective tissue and fat that makes them tough when cooked wrong is exactly what makes them rich and satisfying when cooked right.
If you’re trying to eat well on a budget, shoulder steaks belong in your regular rotation alongside other underrated budget cuts that punch well above their price. They’re also a great entry point for anyone who wants to practice low-and-slow cooking without committing to a full pork butt.
Speaking of which, if you ever want to scale up and smoke a whole shoulder for pulled pork, many of the same principles apply. The collagen-to-gelatin conversion is exactly what you’re chasing in pulled pork recipes too, just pushed further until the meat shreds.
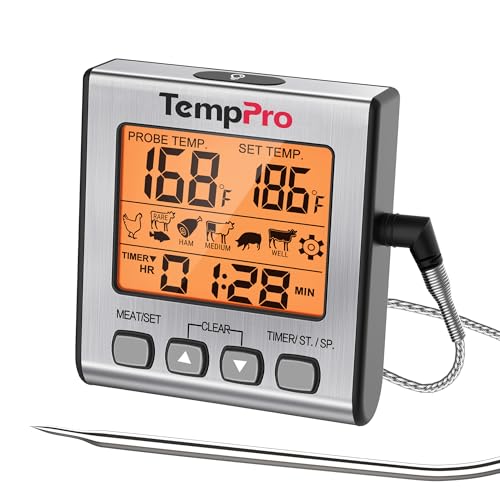
Oven-Safe Digital Probe Thermometer with Alarm
Leave this in the meat during a low-and-slow oven cook so you know the exact moment your steaks hit the target temperature without opening the oven repeatedly.
Quick Troubleshooting Guide
- Steaks turned out chewy: The collagen didn’t break down. Next time, cook lower and longer, or push the internal temp to at least 190°F.
- Steaks turned out dry: You likely hit a safe internal temp but kept cooking without enough moisture. Cover the pan tightly and add liquid next time.
- Crust is soggy after the oven: Pat steaks extremely dry before the final sear, and make sure your pan is fully preheated before they go in.
- Too much fat in the finished dish: Skim the braising liquid before reducing it, and trim any thick exterior fat pads before cooking.
- Flavor is bland: Season more aggressively before cooking, and don’t skip the initial sear. That Maillard reaction crust is where most of the flavor comes from.
Frequently Asked Questions
What internal temperature should pork shoulder steaks reach to be tender?
For food safety, 145°F is the minimum. But tender is a different target entirely. For shoulder steaks to be genuinely soft and easy to chew, you want to push to around 190 to 205°F, which is where collagen fully converts to gelatin. Use an instant-read thermometer to track this without guessing.
How long does it take to cook pork shoulder steaks low and slow?
At 275 to 300°F in the oven, expect 1.5 to 2 hours for steaks that are 3/4 to 1 inch thick. Thicker steaks may need up to 2.5 hours. The internal temperature matters more than the clock, so check with a thermometer rather than going strictly by time.
Can I use a slow cooker instead of the oven?
A slow cooker works well for the braising portion. Cook on low for 6 to 8 hours or high for 4 to 5 hours with enough liquid to come halfway up the steaks. The downside is you can’t do a finishing sear directly in the slow cooker, so you’ll need to transfer them to a hot skillet at the end to build a crust. It’s worth that extra step. Also check out our full rundown of slow cooker techniques for tough, budget-friendly cuts for tips that apply here too.
Should I marinate pork shoulder steaks before cooking?
Marinating adds flavor, but it won’t tenderize the deep connective tissue the way time and heat will. Acidic marinades with vinegar or citrus can help the surface texture slightly, but don’t expect a 4-hour marinade to substitute for proper low-and-slow cooking. Your best bet is to marinate for flavor, then still use a low-and-slow or braise method for the actual cook.
This article contains affiliate links. We may earn a small commission at no extra cost to you.


